
Im Falle von Reklamationen wenden Sie sich bitte an den zugelassenen Händler. If you have a claim, please contact the authorised distributor. Para cualquier reclamación contacte con el distribuidor autorizado.
CARACTERÍSTICAS DEL PRODUCTO
RC BANDIT SNAKE con luz a radio control. RC BAN-
DIT SNAKE incluye gura que mueve su cuerpo en
el sentido del giro. Dispone de funciones completas,
hacia adelante, hacia atrás y giro a izquierda y dere-
cha e interruptor. Mando o transmisor radio control
con control de marcha y giro, antena e incluye LED
indicador de encendido y interruptor. Transmisor
con led indicador de encendido y vinculado*
*Ver sección “Puesta en marcha” de este manual.
INSTRUCCIONES DE USO Y FUNCIONAMIENTO
Los juguetes de IMC TOYS siguen estrictos contro-
les en su producción para garantizar el disfrute y la
seguridad de los niños. Son de fácil uso y funciona-
miento. Estamos seguros que les proporcionarán
grandes momentos de entretenimiento. Le agrade-
cemos la adquisición y la conanza depositada en
uno de nuestros productos.
Para ver nuestro extenso catálogo de productos, le
invitamos a que visite nuestra página web en www.
imctoys.com.
INFORMACIÓN IMPORTANTE
En primer lugar retire todos los plásticos, alambres
y cualquier objeto que esté destinado a sujetar el
producto durante su transporte antes de entregár-
selo a los niños.
FUNCIONAMIENTO CON PILAS
RECUERDE!
La sustitución o manipulación de las pilas, deberá
ser realizada siempre bajo la supervisión de un
adulto.
INSTALACIÓN O SUSTITUCIÓN:
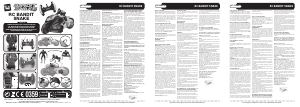
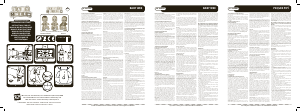
VEHÍCULO RX: Sitúe el selector de función (A)
en la posición OFF y seguidamente abra la tapa de
acceso al compartimento de las pilas, con la ayuda
de un destornillador de estrella tal y como se indica
en la imagen (ver g. 2). Inserte 5 pilas del tipo LR6
(AA) 1.5V preferiblemente alcalinas, respetando la
polaridad indicada en el gráco (ver g. 3). Atornille
de nuevo la tapa con el tornillo de seguridad para
evitar que sus hijos accedan al compartimento de
las pilas.
TRANSMISOR Tx: Con el interruptor (B) del
transmisor en posición OFF, apagado (ver Fig. 1),
Abra el compartimento de las pilas del mando
R/C situado en la parte posterior del mismo y con
la ayuda de un destornillador de estrella, coloque
2 pilas de tipo LR03 (AAA) 1.5V preferiblemente
alcalinas respetando la polaridad, tal y como se
indica en el gráco (ver g. 3), atornille de nuevo la
tapa para la seguridad de sus hijos.
PUESTA EN MARCHA:
En primer lugar conecte siempre el emisor o
mando del modelo a radio control para vincular
el transmisor al vehículo. Para ello, coloque en la
posición ON el interruptor (B) del transmisor (ver g.
1). Un LED rojo luminoso (C) se encenderá de forma
intermitente para indicarnos que el transmisor está
en funcionamiento pero no se encuentra vinculado
a un vehículo (ver g. 1). Seguidamente conecte el
vehículo a radio control cambiando el interruptor
(A) que encontramos en la base de la posición OFF
a la posición ON (ver g. 1). Observe como en unos
segundos el LED del transmisor queda encendido
sin intermitencias, indicando que la vinculación ha
terminado.
Siguiendo este procedimiento de vinculación
pueden llegar a jugar hasta 8 unidades iguales de
radio control a la vez sin problemas de interferencias
entre ellas durante el juego.
¡Importante!. Si durante el juego apaga el
transmisor de forma involuntaria con el vehículo de
radio control en marcha, deberá realizar de nuevo
el proceso de vinculación anteriormente detallado
(apagar vehículo, conectar transmisor y nalmente
conectar vehículo).
Funcionamiento: El transmisor de control es muy fá-
cil de usar. Los botones a la izquierda (D) se utilizan
para mover el vehículo hacia adelante y hacia atrás.
Los de la derecha (E) se utilizan para realizar los giros
a izquierda o derecha.
Figura extraíble: (ver g. 5),
RESOLUCIÓN DE PROBLEMAS:
Mantenga la distancia adecuada entre el mando y el
coche para una correcta recepción de la señal.
Tras la pérdida de señal o funcionamiento
errático recuerde realizar de nuevo el proceso de
vinculación transmisor/vehículo.
Recuerde que una pérdida de señal o un
funcionamiento errático puede ser motivado por el
agotamiento de las pilas.
CUIDADO Y SEGURIDAD
MANTENIMIENTO
Para limpiar el producto, use un paño ligeramente
humedecido. No use detergentes o disolventes.
En el caso de que se mojara el equipo, apáguelo
y saque las pilas inmediatamente. Seque el
compartimiento de pilas con un trapo seco. Deje
destapado el compartimiento de pilas hasta que
esté completamente seco, puede acelerar esta
operación ayudándose de un secador de mano.
No intente utilizar el equipo hasta que éste no esté
completamente seco.
¡ADVERTENCIAS!
- Advertencia. No recomendado para niños meno-
res de 3 años. Contiene piezas pequeñas suscepti-
bles de ser ingeridas. Peligro de asxia.
- Por favor, guarde el embalaje para futuras referen-
cias, ya que contiene información muy importante.
- La empresa se reserva el derecho a que el produc-
to pueda diferir de la ilustración por mejoras técni-
cas.
- Este producto requiere 5 pilas LR6 (AA) 1.5V para el
vehículo y 2 pilas LR03 (AAA) 1.5V para el transmisor
(no incluidas).
- Para un mejor funcionamiento recomendamos el
uso de pilas alcalinas.
- Retire las pilas del compartimiento, cuando no
vaya a utilizar la unidad por un periodo largo de
tiempo.
- La sustitución o manipulación de las pilas, deberá
ser realizada siempre por un adulto.
- Los bornes de las pilas no deben ser cortocircuita-
dos.
- Las pilas no recargables, no deben ser recargadas.
- Recargar las pilas recargables bajo la vigilancia de
un adulto.
- Retirar las pilas recargables del juguete antes de
ser cargadas.
- Solo deben usarse, pilas del tipo recomendado por
el fabricante o equivalente.
- No usar pilas o baterías nuevas y usadas. No deben
ser mezcladas.
- Las pilas o baterías usadas deberán ser retirados
del juguete, podrían causar averías.
- Las pilas o baterías, deben ser colocadas respetan-
do la polaridad indicada en el gráco.
- Por favor, sea respetuoso con el medio ambiente,
y deposite las pilas gastadas en los contenedores
para tal n.
- Lea las instrucciones antes de usar, sígalas y guár-
delas como referencia.
- En un entorno con interferencias de radio frecuen-
cia, la muestra puede funcionar incorrectamente y
su funcionamiento volverá a ser normal cuando se
elimine la interferencia.
- En caso de descarga electroestática, puede pro-
vocarse un mal funcionamiento de la muestra y por
tanto el usuario deberá reiniciarla.
- Si se producen transitorios, la muestra funcionará
mal y el usuario deberá reiniciarla.
- Quitar todos los elementos destinados a la suje-
ción y protección del producto durante el transpor-
te antes de dárselo a los niños, (plásticos, etiquetas,
alambres, etc.).
RECOMENDACIONES PARA UN USO RESPONSA-
BLE Y PARA LA PROTECCIÓN MEDIOAMBIENTAL
Deposita los embalajes de transporte, cartón, plásticos,
etc., en los contenedores de reciclaje de tu localidad.
Utiliza pilas recargables siempre que puedas.
Recuerda desconectar el juguete si has terminado
de jugar y retira las pilas del juguete si no lo vas a
usar por un largo periodo de tiempo.
Si el juguete todavía funciona y ya no lo quieres, no
lo tires. Recuerda que otras personas pueden seguir
disfrutando de el, busca entidades y/o asociaciones
que puedan hacérselo llegar.
No debe tirar el producto a un contenedor de ba-
sura de casa cuando ya no le sea de utilidad. Debe
llevarlo a un punto de reciclaje de dispositivos eléc-
tricos y electrónicos. Consulte el símbolo inscrito en
el producto, el manual de usuario o el embalaje para
más información.
Los materiales son, según el marcado, reciclables. Si
recicla el material o encuentra formas de reutilizar
los dispositivos viejos, contribuye de forma impor-
tante a la protección del medio ambiente. Por favor,
consulte con el centro de reciclaje o con las autori-
dades locales más cercanos.
DECLARACIÓN DE CONFORMIDAD
de acuerdo con la directiva 1999/5/CE
(a disposición de las autoridades de supervisión y
control)
Declaramos bajo nuestra responsabilidad, que
de acuerdo con las disposiciones descritas en
dicha directiva y transpuesta al Real Decreto
1890/2000 del 20 de Noviembre, el producto:
REF: 95229 BANDIT SNAKE
(Clase (EUT) 3 Tipo (EUT) I)/ (Categoría (EUT) III)
Cumple:
A) La documentación técnica relativa al mismo.
B) Requisitos esenciales y otras disposiciones de la
Directiva 1999/5/CE, cuando el producto es usado
para su propósito designado.
C) Con el conjunto de test e informes de radio esen-
ciales y especicaciones técnicas de la categoría
de equipo de radio identicados por el organismo
noticado escogido.
El organismo notificado escogido por el fabri-
cante: INTERTEK TESTING& CERTIFICA-
TIONS LTD
Cleeve Road, Leatherhead. Surrey KT22 7SB
Número Organismo Notificado: 0359
Requisitos en materia de seguridad y protección
siguiendo las exigencias de salud y seguridad de
la presente directiva y de la tipología de producto:
EN71 Part 1: 2011/EN71 Part 2: 2011/EN71 Part 3:
2013 _ RoHs Directive (2011/65/EU)_ EN 62115:
2005 / A11: 2012 _ IEC 60825-1_Cadmium content
(Formerly Directive 91/338/EEC)_EC/1907/2006
REACH_ Phthalates content (Formerly Directive
2005/84/EC)_EC/1907/2006 REACH...*
ETSI EN 300 440-1 V1.6.1 (2010-08) / ETSI EN 300
440-2 V1.4.1 (2010-08) / ETSI EN 301 489-3 V1.6.1
(2013-08) / ETSI EN 301 489-1 V1.9.2 (2011-09) / _
EN62479:2010
* Para un mayor detalle e información respecto a la
conformidad del producto, pueden contactar con
nuestro servicio al cliente a través de este correo
Nombre y dirección del fabricante:
IMC TOYS, S.A._ Pare Llaurador, 172
08224 Terrassa, Barcelona, Spain
Firmado por y en nombre de:
Josep Matarin Carro;
Quality Manager IMC TOYS
Fecha y firma: 01/06/2016
PRODUCT FEATURES
Radio-controlled RC BANDIT SNAKE with light. RC
BANDIT SNAKE includes a gure which leans its
body in the direction of turn and is removable.
With full function control, RC moves forwards,
backwards, turns to the left, right and switches di-
rections. Control or radio control transmitter with
driving and turning control, antenna and on indi-
cator LED, and switch. Transmitter with LED on-o
and connection indicator*
*See the “Operation” section in this manual.
USE AND OPERATING INSTRUCTIONS
IMC TOYS products undergo strict production
controls to guarantee the enjoyment and safety
of your children. They are easy to use and operate.
We are certain that they will provide your children
with great entertainment. Thank you for purchas-
ing one of our products.
To consult our extensive product catalogue, please
visit our web page at www.imctoys.com.
IMPORTANT INFORMATION
First, before giving the product to children, remo-
ve the plastic, wires and any other object designed
to fasten it during transport.
BATTERY OPERATION
REMEMBER!
The batteries must always be replaced or handled
under adult supervision.
INSTALLATION OR REPLACEMENT:
VEHICLE (Rx): Put the function selector (A) in
the OFF position and then open the lid that gives
access to the battery compartment with the help
of a Phillips screwdriver as shown in the image
(see g. 2. Insert 5 batteries type LR6 (AA) with
1.5V, preferably alkaline, following the polarity
indicated in the image (see g. 3). Fasten the cover
using the safety screw to avoid your children from
accessing the battery compartment.
TRANSMITTER Tx: With the transmitter
switch (B) in the OFF position (see Fig. 1), open
the battery compartment located in the back
of the R/C control and with the aid of a cross-
head screwdriver, install 2 type LR03 (AAA) 1.5V
batteries, preferably alkaline, making sure the
poles are the right way round, as indicated in the
illustration (see Fig. 3), and screw the cover back
on for your children’s safety.
OPERATION:
Always switch on the transmitter or remote control
of the radio-controlled model rst in order to
establish the connection between the transmitter
and the vehicle. To do so, put the switch on the
transmitter (B) in the ON position (see Fig. 1). A
red LED light (C) will ash to indicate that the
transmitter is working but is not connected to a
vehicle (see Fig. 1). Then connect the vehicle to the
remote control by moving the switch (A) on the
base of the vehicle from the OFF to the ON position
(see Fig. 1). You will see that in a few seconds the
LED on the transmitter lights up continuously,
indicating that the connection is complete.
If this connection procedure is followed, up to
eight radio-controlled units of the same kind can
play at the same time without any interference
problems between them while playing.
Important! If the transmitter is accidentally
switched o while playing, with the radio-
controlled vehicle in operation, you must repeat
the connection process described above (switch
o the vehicle, turn on the transmitter and nally
turn on the vehicle).
Operation: The radio control transmitter is very
easy to use. The buttons on the left (D) are used to
move the motorcycle forwards and backwards. The
ones on the right (E) are used to turn it left or right.
Removable figure: (see Fig. 5)
TROUBLESHOOTING:
Keep the appropriate distance between the
remote control and the car so that the signal is
received correctly.
After a loss of signal or erratic operation remember
to carry out the transmitter/vehicle connection
process again.
Remember that a loss of signal or erratic operation
may be due to the batteries being at.
SAFETY AND CARE
MAINTENANCE
To clean the product, use a slightly damp cloth. Do
not use detergents or thinners. If the equipment
gets wet, switch it o and remove the batteries
immediately. Dry the battery compartment using
a dry cloth. Leave the battery compartment open
until it is completely dry; you can speed up this
process by using a hair dryer. Do not try to use the
equipment until it is completely dry.
WARNINGS!
- Warning. Not suitable for children under 3 years
of age. It contains small parts which might be in-
gested by them. Choking hazard.
- Please keep the packaging for future reference as
it contains very important information.
- Please note that due to technical improvements
this product may dier from the one that appears
in the illustration.
- This product requires 5 LR6 (AA) 1.5V batteries
for the car and 2 LR03(AAA) 1.5V batteries for the
remote control (Not included).
- This product achieves better performance using
alkaline batteries.
- The batteries or accumulators must be inserted
according to the polarity indicated in the illustra-
tion.
- Used batteries or accumulators must be removed
from the toy; failure to do so could cause damage.
- Do not mix old batteries with new ones.
- Do not mix dierent types of batteries.
- Use only those batteries recommended by the
manufacturer or equivalents.
- Non-rechargeable batteries must not be rechar-
ged.
- The battery terminals must not be bridged or
shorted.
- Changing or handling the batteries must always
be carried out under the supervision of an adult.
- Remove the batteries from the compartment if
the unit is not going to be used for a long period of
time.
- Please respect the environment and deposit used
batteries in the containers provided.
- Rechargeable batteries are to be removed from
the toy before being charged.
- Rechargeable batteries are only to be charged
under adult supervision.
- Read the instructions before use, follow them
and keep them for reference.
- Under the environment with radio frequency
interference, the sample may malfunction and will
be resumed to normal after removal of the interfe-
rence.
- Under the environment with electrostatic dis-
charge, the sample may malfunction and require
user to reset the sample.
- Under the environment with Fast Transient, the
sample may malfunction and require user to reset
the sample.
- Remove all packaging and elements holding and
protecting the product during transport before gi-
ving it to children (plastic, labels, wires, etc).
RECOMMENDATIONS FOR RESPONSIBLE USE
AND FOR PROTECTING THE ENVIRONMENT
Put all the transport packaging, cardboard, plastic,
etc, in the recycling containers in your neighbou-
rhood.
Use rechargeable batteries whenever possible.
Remember to turn o the toy if you have nished
playing with it and take out the batteries if you are
not going to be using it again for a long time.
If you no longer want the toy and it still works, do
not throw it away. Remember that other people
can still enjoy it, and nd bodies or associations
that can give it to them.
At the end of the life span of this product, it must
not be disposed of as normal household rubbish.
It should be delivered to a collection point for re-
cycling electrical and electronic devices. Consult
the symbol on the product, in the user manual or
on the packaging for more information.
The materials are recyclable in accordance with
their markings. If you recycle materials or nd ways
to reuse old devices, you make a considerable con-
tribution to protecting the environment.
Please consult the nearest recycling centre or local
authorities.
DECLARATION OF CONFORMITY
in accordance with the Directive 1999/5/EC
(to available to the Authority of supervision and
control)
This declaration of conformity is issued under
the exclusive responsibility of the manufacturer:
ITEM: 95229 BANDIT SNAKE
(Class (EUT) 3 Type (EUT) I)/ (Category (EUT) III)
Meets:
A) The technical documentation in reference to
the product.
B) Essential requirements and other relevant provi-
sions of Directive 1999/5/EC, when the product is
used for its designated purpose.
C) With the set of test reports and essential speci-
cations techniques of radio frequencies and the
category of radio equipment identied by the no-
tied body chosen.
The notied body chosen by the manufacturer:
INTERTEK TESTING& CERTIFICATIONS LTD
Cleeve Road, Leatherhead. Surrey KT22 7SB
Notified Body number : 0359
Requirements for safety and security following
health and safety requirements of this Directive
and by the type of product: EN71 Part 1: 2011/
EN71 Part 2: 2011/EN71 Part 3: 2013 _ RoHs Di-
rective (2011/65/EU)_ EN 62115: 2005 / A11:
2012 _ IEC 60825-1_Cadmium content (Formerly
Directive 91/338/EEC)_EC/1907/2006 REACH_
Phthalates content (Formerly Directive 2005/84/
EC)_EC/1907/2006 REACH...*
ETSI EN 300 440-1 V1.6.1 (2010-08) / ETSI EN 300
440-2 V1.4.1 (2010-08) / ETSI EN 301 489-3 V1.6.1
(2013-08) / ETSI EN 301 489-1 V1.9.2 (2011-09) / _
EN62479:2010
*To get more accurate information about product
conformity, thanks to contact our customer
services by email using the following address:
Name and address of the manufacturer:
IMC TOYS, S.A._ Pare Llaurador, 172
08224 Terrassa, Barcelona, Spain
Signed for and on behalf of:
Josep Matarin Carro;
Quality Manager IMC TOYS
Date and signature: 01/06/2016
PRODUKTEIGENSCHAFTEN
RC BANDIT SNAKE mit kabellos gesteuertem
Licht. RC BANDIT SNAKE wird mit einer Figur
geliefert, die den Körper in die Lenkrichtung be-
wegt und herausgenommen werden kann. Voll
funktionsfähig: vorwärts, rückwärts, Kurvenfah-
ren links und rechts, Ein/Aus-Schalter. Fernbe-
dienung oder Funksteuerung mit Fahrt- und
Lenksteuerung, Antenne, LED-Betriebsanzeige,
und Ein/Aus-Schalter. Sender mit LED-Anzeige
zur Angabe des Einschaltzustandes und der
Verknüpfung*
*Siehe Abschnitt “Produktaktivierung” dieser Anleitung.
GEBRAUCHSANWEISUNGEN
Alle Spielzeuge von IMC TOYS werden strengs-
ten Produktionskontrollen unterzogen, um
Spielspaß und Sicherheit für Ihre Kinder zu
garantieren. Unsere Produkte sind einfach zu
benutzen und zu bedienen. Wir sind sicher, dass
Ihre Kinder viel Freude daran haben werden.
Vielen Dank für Ihren Kauf und das Vertrauen,
das Sie in unsere Produkte gesetzt haben.
Zur Ansicht unseres ausführlichen Produktkata-
loges besuchen Sie bitte unsere Webseite unter
www.imctoys.com.
WICHTIGE INFORMATIONEN
Entfernen Sie sämtliche Kunststoteile, Draht-
teile sowie alle anderen Transportsicherungen
des Produktes, bevor Sie es Kindern geben.
BATTERIEGEBRAUCH
NICHT VERGESSEN!
Der Ersatz oder die Manipulation der Batterien
muss immer unter Aufsicht eines Erwachsenen
durchgeführt werden.
INSTALLATION ODER AUSTAUSCH:
FAHRZEUG Rx: Bringen Sie den
Funktionsschalter (A) in die Position OFF,
anschließend önen Sie die Abdeckung
des Batteriefachs mit Hilfe eines Stern-
Schraubendrehers, wie in der Abbildung
gezeigt (siehe Abb. 2). Legen Sie 5 batterien
vom Typ LR6 (AA) 1.5V, vorzugsweise
alkalinische, in das Batteriefach ein und achten
Sie auf die in der Grak gezeigten Polarität
(siehe Abb. 3). Schrauben Sie den Deckel mit
der Sicherheitsschraube wieder fest, um zu
verhindern, dass die Kinder an das Batteriefach
gelangen.
FERNSTEUERUNG Tx: Öne, mit dem
Schalter (B) der Fernsteuerung auf der
Position OFF (ausgeschaltet) (siehe Abb.
1), das Batteriefach auf der Rückseite der
Fernsteuerung und entferne es mit Hilfe eines
Kreuzschlitzschraubenziehers, setze 2 LR03
(AAA) Batterien mit 1.5V ein, soweit möglich
alkalisch, der Polarität entsprechend, wie in
der Grak beschrieben (siehe Abb. 3), ein und
schraube den Deckel zur Sicherheit der Kinder
wieder fest.
PRODUKTAKTIVIERUNG:
Verbinde zuerst immer die funkgesteuerte
Fernsteuerung zum Verbinden der
Fernsteuerung mit dem Fahrzeug. Setze
hierfür den Schalter (B) der Fernsteuerung auf
die Position ON (siehe Abb. 1). Eine rote LED-
Anzeige (C) beginnt zu blinken um anzuzeigen
dass die Fernsteuerung funktionsfähig, aber
nicht mit einem Fahrzeug verbunden ist (siehe
Abb. 1). Verbinde dann das Fahrzeug mit der
Funksteuerung indem der Schalter (A) von der
Position OFF auf ON geschaltet wird (siehe Abb.
1). Beobachte wie nach einigen Sekunden das
LED-Licht der Fernsteuerung an bleibt ohne zu
blinken, um anzuzeigen, dass die Verbindung
erfolgreich war.
Nach diesem Verbindungsprozess können bis
zu 8 gleiche Funk-Einheiten gleichzeitig ohne
Interferenzen im Spiel gebraucht werden.
Funktionsweise: Die Fernbedienung ist einfach
zu bedienen. Die Knöpfe links (D) dienen dazu,
das Fahrzeug vorwärts und rückwärts zu bewe-
gen. Die Knöpfe rechts (E) dienen zum Lenken
nach links bzw. rechts.
Figur herausnehmbar: (siehe Abb. 5)
PROBLEMBEHEBUNG:
Halte die richtige Entfernung zwischen der
Fernsteuerung und dem Fahrzeug für einen
guten Empfang ein.
Vergiss nicht nach einem Empfangsverlust
oder einer fehlerhaften Funktionsweise die
Verbindung zwischen Fernsteuerung und
Fahrzeug erneut herzustellen.
Vergiss nicht, dass ein Empfangsverlust oder
eine fehlerhafte Funktionsweise durch leere
Batterien hervorgerufen werden kann.
PFLEGE UND SICHERHEIT
INSTANDHALTUNG
Für die Reinigung des Produkts benutzen
Sie ein leicht angefeuchtetes Tuch. Keine
Putz- oder Lösungsmittel verwenden. Falls
das Produkt nass wird, sofort ausschalten und
die Batterien entnehmen. Das Batteriefach
mit einem trockenen Tuch trocknen. Das
Batteriefach oen lassen, bis es vollständig
getrocknet ist; diese Operation können Sie mit
einem Haartrockner beschleunigen. Versuchen
Sie nicht, das Produkt zu benutzen, bevor es
vollständig trocken ist.
ACHTUNG!
- Achtung. Nicht für Kinder unter 3 Jahren geeig-
net. Enthält Kleinteile, die verschluckt werden
könnten. Erstickungsgefahr.
- Die Verpackung bitte für spätere Bezugsnah-
men aufbewahren, da sie sehr wichtige Infor-
mation enthält.
- Die Herstellungsrma behält sich das Recht
vor, technische Korrekturen am Produkt vor-
zunehmen, sodass es sich von der Abbildung
unterscheiden kann.
- Dieses Produkt benötigt 5 Batterien LR6 (AA)
1.5V für das Auto und 2 Batterien LR03 (AAA)
1.5V für die Steuerung (nicht eingeschlossen).
- Für einen optimalen Betrieb empfehlen wir die
Verwendung von Alkalibatterien.
- Achten Sie beim Einlegen der Batterien oder
Akkumulatoren auf die richtige Polung, siehe
Abbildung.
- Leere Batterien oder Akkumulatoren sind aus
dem Spielzeug zu entfernen, da sie Störungen
verursachen können.
- Keine alten Batterien mit neuen Batterien be-
nutzen.
- Keine unterschiedlichen Batterietypen benut-
zen.
- Nur den vom Hersteller oder Händler empfoh-
lenen Batterietyp benutzen.
- Nichtauadbare Batterien dürfen nicht wieder-
aufgeladen werden.
- Die Batteriepole dürfen nicht kurzgeschlossen
werden.
- Das Ersetzen oder die Handhabung der Batteri-
en sollte immer unter der Aufsicht eines Erwach-
senen durchgeführt werden.
- Entfernen Sie die Batterien aus dem Fach,
wenn das Gerät längere Zeit nicht benutzt wird.
- Schonen Sie bitte die Umwelt und werfen sie
leere Batterien in die dafür vorgesehenen Behäl-
ter.
- Vor dem Auaden müssen die auadbaren
Batterien aus dem Spielzeug entnommen wer-
den.
- Das Auaden der auadbaren Batterien soll-
te nur unter der Aufsicht eines Erwachsenen
durchgeführt werden.
- Lesen Sie die Anweisungen vor Gebrauch, fol-
gen Sie ihnen und halten Sie sie als Referenz.
- Funkstörungen können den Betrieb des Pro-
dukts beeinträchtigen. Nach Beseitigung der
Störquelle funktioniert das Produkt wieder ord-
nungsgemäß.
- Bei elektrostatischer Entladung kann Störung
beim Modell auftreten, in diesem Fall soll der
Benutzer das Modell erneut starten.
- Entfernen Sie sämtliche Transportsicherungs-
und Schutzelemente des Produktes, bevor Sie
es Kindern geben (Kunststoteile, Etikette,
Drahtteile etc…).
TIPPS FÜR EINE VERNÜNFTIGE VERWEN-
DUNG UND FÜR DEN UMWELTSCHUTZ
Werfen Sie sämtliches Verpackungsmaterial,
Karton, Kunststo usw. in die entsprechenden
Recycling-Container Ihrer Gemeinde.
Verwenden Sie sofern möglich auadbare Bat-
terien.
Achten Sie darauf, das Spielzeug nach dem
Spielen auszuschalten und die Batterien zu ent-
nehmen, wenn es für einen längeren Zeitraum
nicht benutzt wird.
Wenn das Spielzeug noch einwandfrei funktio-
niert und nicht mehr verwendet wird, so werfen
Sie es bitte nicht weg. Denken Sie daran, dass
es anderen Menschen Freude bereiten kann
und bringen Sie das Spielzeug zu Einrichtungen
und/oder Vereinen, die es weitergeben.
Werfen Sie das ausgediente Produkt nicht in
den Hausmüll. Bringen Sie es zu einer Recycling-
Sammelstelle für elektrische und elektronische
Geräte. Siehe Symbol auf dem Produkt, Bedie-
nungsanleitung oder Verpackung für weitere
Informationen.
Die Produktmaterialen sind gemäß Markierung
wiederverwertbar. Wenn Sie das Material wie-
derverwerten oder alte Geräte in irgendeiner
Form wiederverwenden, leisten Sie einen wich-
tigen Beitrag zum Umweltschutz.
Wenden Sie sich bitte an die Recyclingzentrale
oder die nächsten örtlichen Behörden.
KONFORMITÄTSERKLÄRUNG
(R & TTE)-RICHTLINIE 1999/5/EG
(Erhältlich bei der Aufsichtsbehörde und Kontrolle)
Die alleinige Verantwortung für die Ausstel-
lung dieser Konformitätserklärung trägt der
Hersteller:
Art.-Nr.: 95229 BANDIT SNAKE
(Klasse (EUT) 3 Typ (EUT) I) (Kategorie (EUT)III)
Treffpunkt:
A) die technischen Unterlagen über das gleiche.
B) die wesentlichen Anforderungen des Artikels
3 und den übrigen einschlägigen Bestimmun-
gen der Richtlinie 1999/5/EG, wenn sie für den
vorgesehenen Zweck verwendet wird.
C) die Sätze von wesentlichen Funk Tests und
Spezikation von Funkanlagen Kategorie von
der benannten Stelle identiziert gewählt.
Die benannte Stelle die vom Hersteller aus-
gewählte:
INTERTEK TESTING& CERTIFICATIONS LTD
Cleeve Road, Leatherhead. Surrey KT22 7SB
Nummer der benannten Stelle: 0359
Schutzvoraussetzungen im Hinblick auf die
Anforderungen des Gesundheitsschutzes und
der Sicherheit in Übereinstimmung mit der
richtlinie 1999/5/EG: EN71 Part 1: 2011/EN71
Part 2: 2011/EN71 Part 3: 2013 _ RoHs Directive
(2011/65/EU)_ EN 62115: 2005 / A11: 2012 _ IEC
60825-1_Cadmium content (Formerly Directive
91/338/EEC)_EC/1907/2006 REACH_ Phthala-
tes content (Formerly Directive 2005/84/EC)_
EC/1907/2006 REACH...*
ETSI EN 300 440-1 V1.6.1 (2010-08) / ETSI EN 300
440-2 V1.4.1 (2010-08) / ETSI EN 301 489-3 V1.6.1
(2013-08) / ETSI EN 301 489-1 V1.9.2 (2011-09) /
_ EN62479:2010
* Für weitere Details und Informationen über
die Konformität des Produkts, können Sie
unserem Kundendienst über diese E-Mail an:
Name und Anschrift des Herstellers oder
seines
Bevollmächtigten:
IMC TOYS, S.A._ Pare Llaurador, 172
08224 Terrassa, Barcelona, Spain
Unterzeichnet für und im
Namen von:
Josep Matarin Carro;
Quality Manager IMC TOYS
Ort und Datum der Ausstellung: 01/06/2016
DE - DEUTSCH EN - ENGLISH ES - ESPAÑOL
RC BANDIT
SNAKE
RC BANDIT SNAKERC BANDIT SNAKE RC BANDIT SNAKE
GEBRAUCHSANLEITUNG · INSTRUCTIONS FOR
USE • MANUAL DE INSTRUCCIONES • MANUEL
D’INSTRUCTIONS • MANUALE INSTRUZIONI •
GEBRUIKSAANWIJZING •MANUAL DE INSTRUÇÕES •
ИНСТРУКЦИЯ ПО ЭКСПЛУАТАЦИИ
95229-V1
ITEM 95229 • EAN: 8421134095229 • 050716 • 24
IMC. TOYS, S.A. • Pare Llaurador, 172 • 08224 Terrassa (Barcelona) SPAIN
Tel. 0034 937 888 992 • Fax 0034 937 332 833 • www.imctoys.com
0359
Made in China
2 x LR03 (AAA)
1
2
3
B
A
4
5
F
E
D
F
E
D
C



Присоединиться к беседе по данному изделию
Здесь вы можете поделиться тем, что думаете о IMC Toys 95229 Radio Controlled Toys Bandit Snake. Если у вас есть вопросы, сначала внимательно прочтите инструкцию. Запросить руководство можно с помощью контактной формы.