
EN Instruction manual
NL Gebruiksaanwijzing
FR Mode d’emploi
DE Bedienungsanleitung
ES Manual de usuario
PT Manual de utilizador
IT Manuale utente
SV Bruksanvisning
CS Návod na použití
PL Instrukcja obsługi
SK Návod na použitie
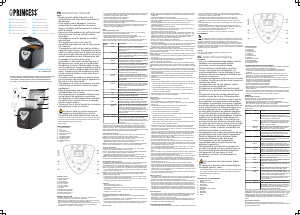
Automatic Bread Maker
01.152010.01.001
RU Руководство по эксплуатации
1
9
2
8 1110
3
5
6
7
4
PARTS DESCRIPTION / ONDERDELENBESCHRIJVING / DESCRIPTION DES PIÈCES
/ TEILEBESCHREIBUNG / DESCRIPCIÓN DE LAS PIEZAS / DESCRIÇÃO DOS
COMPONENTES / DESCRIZIONE DELLE PARTI / BESKRIVNING AV DELAR /
OPIS CZĘŚCI / POPIS SOUČÁSTÍ / POPIS SÚČASTÍ / ОПИСАНИЕ ЗАПЧАСТИ
12
© Princess 2021 | Jules Verneweg 87
5015 BH Tilburg | The Netherlands | www.princesshome.eu
IN NEED OF ACCESSORIES? VISIT
WWW.PRINCESSHOME.EU/NL-NL/CUSTOMERSERVICE/ACCESSORIES-SPAREPARTS
FOR ACCESSORIES AND SPARE PARTS TO EXTEND YOUR ITEM!
ENInstruction manual
SAFETY
• By ignoring the safety instructions the
manufacturer cannot be held responsible for
the damage.
• If the supply cord is damaged, it must be
replaced by the manufacturer, its service
agent or similarly qualified persons in order to
avoid a hazard.
• Never move the appliance by pulling the cord
and make sure the cord cannot become
entangled.
• The appliance must be placed on a stable,
level surface.
• This appliance is only to be used for
household purposes and only for the purpose
it is made for.
• This appliance shall not be used by children
aged less than 8 years. This appliance can be
used by children aged from 8 years and above
and persons with reduced physical, sensory or
mental capabilities or lack of experience and
knowledge if they have been given
supervision or instruction concerning use of
the appliance in a safe way and understand
the hazards involved. Children shall not play
with the appliance. Keep the appliance and its
cord out of reach of children aged less than 8
years. Cleaning and user maintenance shall
not be made by children unless older than 8
and supervised.
• To protect yourself against an electric shock,
do not immerse the cord, plug or appliance in
the water or any other liquid.
• The appliance is to be connected to a socket-
outlet having an earthed contact (for class I
appliances).
• Keep the appliance and its cord out of reach
of children less than 8 years.
• The temperature of accessible surfaces may
be high when the appliance is operating.
• The appliance is not intended to be operated
by means of an external timer or a separate
remote-control system.
• To prevent fire or shock hazard do not expose
this appliance to rain or moisture.
• Surface is liable to get hot during use.
• This appliance is intended to be used in
household and similar applications such as:
– Staff kitchen areas in shops, offices and other working
environments.
– By clients in hotels, motels and other residential type
environments.
– Bed and breakfast type environments.
– Farm houses.
PARTS DESCRIPTION
1. Operation panel
2. Lid
3. Lid handle
4. Viewing window
5. Baking compartment
6. Bread pan
7. Bread pan handle
8. Kneading paddle
9. Measuring cup
10. Measuring spoon
11. Hook
12. Ingredient dispenser
Operation panel
13. Start/stop button
14. Menu button
15. Color button
16. Loaf size button
17. Time + button
18. Time - button
19. Display
20. Baking mode indicator
21. Baking time indicator
22. Roast colour indicator
23. Loaf size indicator
BEFORE THE FIRST USE
• Take the appliance andaccessoriesoutthebox.Removethe
stickers,protective foilorplasticfrom thedevice.
• Before using your appliance for the first time, wipe off all removable
parts with a damp cloth. Never use abrasive products.
• Place the device on a flat stable surface and ensure a minimum of 10
cm. free space around the device. This device is not suitable for
installation in a cabinet or for outside use.
• Insert the mains plug into the wall socket.
• Set the following baking mode: BAKE.
• Start the baking process. The device starts heating.
• After 10 minutes, remove the mains plug from the wall socket and allow
the device to cool down completely.
• When the device is turned on for the first time, a slight odour will occur.
This is normal, ensure adequate ventilation. This fragrance is only
temporary and will disappear soon.
USE
Setting the baking mode
The baking mode can be set using the menu button. The baking mode
indicator shows the baking mode.
• Refer to the table below to set the correct baking mode.
• Repeatedly press the menu button to set the baking mode. The
appliance will beep each time you press the button.
Note: If the last setting has been reached, it is still possible to adjust the
setting. Press the menu button to go back to the first setting.
Baking
mode
Name Application
1 BASIC White and mixed breads mainly made from
wheat flour or rye flour. The bread has a
compact consistency. Use normal yeast for the
baking mode.
2 FRENCH Light breads made from fine flour. The bread is
usually fluffy and has a crispy crust. The baking
mode is not suitable for baking recipes requiring
butter, margarine or milk.
3 WHOLE
WHEAT
Heavy breads with heavy varieties of flour
requiring a longer phase of kneading and rising.
The bread has a compact consistency.
4 QUICK Kneading, rising and baking bread in less time
than when using the baking mode "BASIC". The
bread is usually small and has a dense texture.
Use baking powder instead of baking yeast.
5 SWEET Breads with sweet additives (sugar, chocolate,
dry fruits or fruit juices). The bread has an airy
consistency and a light texture.
6 ULTRA-
FAST-I
Kneading, rising and baking a loaf of bread
(700g) in a shortest time. The bread is usually
smaller and coarser than when using the baking
mode "QUICK". Use quick-rise yeast for the
baking mode.
7 ULTRA-
FAST-II
Kneading, rising and baking a loaf of bread
(900g) in a shortest time. The bread is usually
smaller and coarser than when using the baking
mode "QUICK". Use quick-rise yeast for the
baking mode.
8 DOUGH Kneading and rising, without baking. Making
bread rolls, pizza, steamed bread, etc.
9 JAM Making jam and marmalade.
10 CAKE Kneading, rising and baking cakes. Use baking
powder instead of baking yeast.
11 SANDWICH Kneading, rising and baking sandwiches. The
bread has a light texture and a thin crust.
12 BAKE Additional baking of breads that are too light or
not baked through, without kneading or rising.
13 GLUTEN
FREE*
Gluten-free dough is usually wetter than normal
dough. Do not over-mix or over-knead gluten-
free dough. Gluten-free dough must rise only
once and requires a longer baking time than
normal dough. Add additional ingredients to the
basic ingredients at the very beginning of the
baking process.
14 KNEAD Kneading, without rising and baking.
15 YOGURT Rising, without kneading and baking. Available
times: 6 hours or 8 hours. Press the TIME +
button or the TIME - button to select the time.
Press the START/ STOP button to set the time.
* A gluten-free diet is recommended for persons suffering from celiac
disease (gluten enteropathy) and wheat allergy. The gluten free diet is
completely free of ingredients derived from gluten-containing cereals
(wheat, rye, barley, etc.). The gluten-free diet is also completely free of
gluten as a food additive in the form of a flavoring, stabilizing or thickening
agent. Additionally, some gluten free diets exclude oats.
Setting the roast color
The roast color can be set using the color button. The roast color indicator
shows the roast color: light / medium / dark.
Note: The roast color cannot be set in the following baking modes: dough
and jam.
• Repeatedly press the color button to set the roast color.
Setting the loaf size
• The loaf size can be set using the loaf size button. The loaf size indicator
shows the loaf size: 700g / 900g.
Note: The loaf size cannot be set in the following baking modes: quick,
dough, jam, cake and bake.
Delaying the baking process
• The appliance has a delay start function (max. 13 hours) which makes it
possible to program the time before starting the baking process.
• The baking process can be delayed using the time + button and the time
- button. The baking time indicator shows the baking time.
• Before you proceed, we need you to pay attention to the following notes:
• Do not delay the baking process for recipes with perishable ingredients
(eggs, cheese, fresh milk, etc.).
Note: The baking process cannot be delayed in the following baking
modes: Ultra fast, Jam and Bake.
• Press the time + button to increase the time by 10 minutes. Keep the
button pressed to accelerate the process.
• Press the time - button to decrease the time by 10 minutes. Keep the
button pressed to accelerate the process.
Example:
• The current time is 7:30 p.m.
• The delayed finish time is 8 a.m.
• The difference between the delayed finish time and the current time is
12.5 hours.
• Press the time + button or the time - button until the baking time indicator
shows "12:30".
Starting and stopping the baking process
• The Start/Stop button must be used to start and stop the baking process.
• If the baking process is set, press the Start/Stop button to start the
process. A short beep will be heard and the two dots in the LCD begin to
flash, the working light illuminates and the program starts.
• If the baking process is running, press the Start/Stop button for approx. 2
seconds until a beep sounds to stop the process.
Hints for use
• Before assembly or disassembly, remove the mains plug from the wall
socket and wait until the appliance has cooled down.
• Allow the bread pan to cool down before removing the bread.
• Mount the kneading paddle onto the spindle into the bottom of the bread
pan.
• Put the ingredients into the bread pan in the required order. Usually the
water or liquid substance should be put firstly, then add sugar, salt and
flour, always add yeast or baking powder as the last ingredient. If
necessary, use the measuring cup or the measuring spoon to add the
ingredients.
NOTE: The maximum quantity of flour and yeast separately is 490g and
6g.
• Open the lid using the lid handle.
• Mount the bread pan into the bottom of the baking compartment. Lock
the bread pan by turning it clockwise.
• Close the lid using the lid handle.
• Insert the mains plug into the wall socket. The appliance will beep. The
display comes on. The baking mode indicator shows "1". The baking time
indicator shows "3:00". The roast color indicator indicates "medium". The
loaf size indicator indicates "900g".
• Set the baking mode using the menu button.
• Set the roast color using the color button.
• Press the loaf button to select the desired size (700g or 900g).
• If necessary, delay the baking process using the time + button and the
time - button.
• Press the Start/Stop button to start the process.
• Regularly look through the viewing window to check whether the food is
baked and to make sure that it does not burn.
Note: In the following baking modes: Basic, French, Quick, Sweet, Ultra
fast, Cake and Sandwich; before operation, put the dried ingredients in the
ingredient dispenser, then the ingredients will be divided into the bread
automatically.
Note: Steam can escape through the lid during the baking process. This is
normal operation.
• If the process is completed, ten beeps will sound to indicate the end of
the process.
• The appliance will keep the food warm for a maximum of 60 minutes.
• A beep will sound to indicate the end of the process.
• The on/off indicator goes off.
Note: The appliance will not keep the food warm in the following baking
modes: Dough, Jam, Knead, Yogurt. If the process is completed, a beep
will sound to indicate the end of the process. The on/off indicator goes off.
• Before you proceed, we need you to pay attention to the following notes:
• Use oven gloves to remove the bread pan from the baking compartment
and the bread from the bread pan. The bread pan and the bread become
very hot during use.
• Unlock the bread pan by turning it counterclockwise. Remove the bread
pan from the baking compartment using the bread pan handle.
• Remove the bread from the bread pan. If necessary, use a rubber or
plastic spatula.
– Note: If the kneading paddle remains in the bread pan, fill the
bread pan with hot water to remove the kneading paddle. Do not
use sharp or metal objects to remove the kneading paddle.
– If the kneading paddle remains in the bread, use the hook to
remove the kneading paddle. Do not use sharp or metal objects
to remove the kneading paddle.
• Remove the mains plug from the wall socket. The display goes off.
• Allow the appliance to cool down completely.
General tips
• Make sure that the ingredients are of good quality and at room
temperature.
• Place the appliance on a stable and flat surface.
• If the baking compartment is still warm, allow it to cool down completely
before use.
• Put the ingredients into the bread pan in the required order:
– Put the liquid ingredients into the bread pan.
– Put a small amount of flour into the bread pan.
– Put the solid ingredients into the bread pan.
– Put the rest of the flour into the bread pan. Make sure that all
solid ingredients are covered by the flour.
– Make a small indentation on one side of the flour. Pour the
baking yeast or the baking powder into the indentation.
– Make sure that the baking yeast or the baking powder does not
come into contact with salt or liquid ingredients.
• Preferably use bread-making flour. If you use heavy flour (wheat flour,
rye flour, corn flour, etc.), the bread will rise less than if you use light
flour. Use the correct amount of flour. If necessary, use a kitchen scale to
measure the amount of flour.
• Use the correct amount of baking yeast. Use dried active baking yeast
instead of baking powder. If you use fresh yeast, use thrice more yeast
than if you use dried yeast and solve the yeast in a small amount of
lukewarm water. Make sure that the baking yeast does not come into
contact with water, milk, salt, or sugar.
• Use lukewarm water. If possible, use tap water. If you use eggs, break
the eggs and add them to the water.
• If you use milk, use fresh milk or milk powder. If you use milk powder,
add the required amount of water to the milk powder. If you want to add
water to the fresh milk, the total amount of milk and water must be equal
to the required amount for the recipe.
• If you use sugar, preferably use white sugar, brown sugar, or honey. Do
not use refined sugar or sugar cubes.
• If you use salt, the yeast will rise better and the bread will have more
taste.
• If you use butter or oil, the bread will become softer and have more taste.
If you use butter, cut the butter into pieces or allow it to become soft.
• Keep the lid closed during the baking process.
• If the baking process is completed, use oven gloves to remove the bread
pan from the baking compartment and the bread from the bread pan.
• Allow the bread to cool down before cutting the bread into slices. If you
want to eat the bread when it is still warm, it is recommended to cut the
bread into slices of 2.5 cm.
• Use a serrated knife or an electric knife to cut the bread into slices.
• Keep the bread in an hermetically sealed container to keep the bread
fresh as long as possible (approximately 2 days). If the bread contains
eggs, the bread must be consumed the same day. If the bread contains
neither butter nor oil, the bread must be consumed the same day. Do not
keep the bread in the refrigerator.
• If you want to keep the bread in the freezer, put the bread into a freezing
bag before putting it into the freezer.
Memory function
• The appliance is equipped with a memory function. If the power supply is
interrupted, the baking process will be continued automatically after 10
minutes, even without pressing the Start/Stop button.
• Before you proceed, we need you to pay attention to the following notes:
• If the power supply is interrupted for more than 10 minutes, the memory
function will not work. Remove the old ingredients from the bread pan.
(Do not use the old ingredients for other cooking purposes!) Put new
ingredients into the bread pan. Restart the appliance. If the dough is not
yet in the rising phase when the power supply is interrupted, you can
press Start/Stop button to continue the program from the beginning.
Error messages
• If the display shows "HHH" after pressing the Start/Stop button, the
temperature in the baking compartment is too high. The appliance will
not operate until it has cooled down. Open the lid and allow the
appliance to cool down for 10-20 minutes.
• If the display shows "LLL" after pressing the Start/Stop button (except the
programs bake), the temperature in the baking compartment is too low.
Open the lid and allow the appliance to rest for 10 to 20 minutes to return
to room temperature.
• If the display shows "EE0" after pressing the Start/Stop button, the
temperature sensor is disconnected. Have the temperature sensor
checked by an authorized repair agent.
TROUBLESHOOTING
Problem Cause Solution
Smoke comes out of the
baking compartment or of
the vents.
The ingredients stick to
the baking
compartment or on the
outside of the baking
pan.
Pull out the plug and
clean the outside of
the baking pan or the
baking compartment.
The bread goes down in
the middle and is moist
on the bottom.
The bread is left too
long in the pan after
baking and warming.
Take the bread out of
the baking pan before
the warming function
is over.
It is difficult to take the
bread out of the baking
pan.
The bottom of the loaf
is stuck to the kneading
blade.
Clean the kneading
blade and shafts after
the baking. If
necessary, fill the
baking pan with warm
water for 30 minutes,
then the kneading
blade can be easily
removed and
cleaned.
The ingredients are not
mixed or the bread is not
baked correctly.
Incorrect program
setting.
Check the selected
menu and the other
settings.
The START/STOP
button was touched
while the machine was
working.
Do not use the
ingredients and start
over again.
The lid opened several
times while the
machine works.
Never open the lid
frequently, otherwise
it is necessary, such
as add ingredients
and make sure that
lid is closed well after
being opened.
Long blackout while the
machine was working.
Do not use the
ingredients and start
over again.
The rotation of the
kneading blade is
blocked.
Check that the
kneading blade is
blocked by grains,
etc. Pull out the
baking pan and check
whether the drivers
turn. If this is not the
case, send the
appliance to the
customer service.
The appliance does not
start. The display shows
HHH.
The appliance is still
hot after the previous
baking procedure.
Pull out the plug, take
out the baking pan
and leave it to cool at
room temperature.
then insert the plug
and start again.
CLEANING AND MAINTENANCE
• Always unplug the device and let it cool down completely before cleaning
• Clean the outside with a damp cloth. Never use harsh and abrasive
cleaners, steel wool or a scouring pad as this will damage the device. Do
not immerse in water or other liquid.
• Thoroughly dry the outside of the device with a clean, dry cloth.
• Clean the lid and the baking compartment with a soft, damp cloth.
Thoroughly dry the lid and the baking compartment with a clean, dry
cloth.
• Clean the bread pan in soapy water. Thoroughly dry the bread pan with a
clean, dry cloth.
• If the kneading paddle is clogged, clean the kneading paddle with a
wooden or plastic toothpick. Clean the kneading paddle in soapy water.
Thoroughly dry the kneading paddle with a clean, dry cloth.
• Do not use sharp objects to clean the device.
• Do not use oven cleaners to clean the inside of the device.
ENVIRONMENT
This appliance should not be put into the domestic garbage at the
end of its durability, but must be offered at a central point for the recycling
of electric and electronic domestic appliances. This symbol on the
appliance, instruction manual and packaging puts your attention to this
important issue. The materials used in this appliance can be recycled. By
recycling of used domestic appliances you contribute an important push to
the protection of our environment. Ask your local authorities for information
regarding the point of recollection.
Support
You can find all available information and spare parts at
www.princesshome.eu!
NLGebruiksaanwijzing
VEILIGHEID
• Als u de veiligheidsinstructies negeert, kan de
fabrikant niet verantwoordelijk worden
gehouden voor de mogelijke schade.
• Als het netsnoer beschadigd is, moet het
worden vervangen door de fabrikant, de
onderhoudsmonteur van de fabrikant of door
personen met een soortgelijke kwalificatie om
gevaar te voorkomen.
• Verplaats het apparaat nooit door aan het snoer
te trekken en zorg dat het snoer niet in de war
kan raken.
• Het apparaat moet op een stabiele, vlakke
ondergrond worden geplaatst.
• Dit apparaat is uitsluitend voor huishoudelijk
gebruik en voor het doel waar het voor bestemd
is.
• Dit apparaat mag niet worden gebruikt door
kinderen jonger dan 8 jaar. Dit apparaat kan
worden gebruikt door kinderen vanaf 8 jaar en
door personen met verminderde lichamelijke,
zintuiglijke of geestelijke vermogens of gebrek
aan de benodigde ervaring en kennis indien ze
onder toezicht staan of instructies krijgen over
hoe het apparaat op een veilige manier kan
worden gebruikt alsook de gevaren begrijpen
die met het gebruik samenhangen. Kinderen
mogen niet met het apparaat spelen. Houd het
apparaat en het netsnoer buiten bereik van
kinderen jonger dan 8 jaar. Laat reiniging en
onderhoud niet door kinderen uitvoeren, tenzij
ze ouder zijn dan 8 jaar en onder toezicht staan.
• Dompel het snoer, de stekker of het apparaat
niet onder in water of andere vloeistoffen om
elektrische schokken te voorkomen.
• Het apparaat moet worden aangesloten op een
geaard stopcontact (voor klasse I-apparaten).
• Houd het apparaat en het netsnoer buiten
bereik van kinderen jonger dan 8 jaar.
• De temperatuur van de toegankelijke
oppervlakken kan hoog zijn wanneer het
apparaat in gebruik is.
• Het apparaat is niet bedoeld om bediend te
worden met behulp van een externe timer of
een afzonderlijk afstandbedieningssysteem.
• Het apparaat niet aan regen of vocht
blootstellen om brand- of schokgevaar te
voorkomen.
• Het oppervlak wordt heet tijdens gebruik.
• Dit apparaat is bedoeld voor huishoudelijk en
soortgelijk gebruik, zoals:
– Personeelskeukens in winkels, kantoren en andere
werkomgevingen.
– Door gasten in hotels, motels en andere residentiële
omgevingen.
– Bed&Breakfast-type omgevingen.
– Boerderijen.
BESCHRIJVING VAN ONDERDELEN
1. Bedieningspaneel
2. Deksel
3. Handgreep van deksel
4. Kijkvenster
5. Bakgedeelte
6. Broodpan
7. Handgreep van broodpan
8. Kneder
9. Maatbeker
10. Maatlepel
11. Haak
12. Ingrediëntendispenser
Bedieningspaneel
13. Start/stop-toets
14. Menutoets
15. Kleurtoets
16. Toets voor broodgrootte
17. Toets voor meer tijd
18. Toets voor minder tijd
19. Display
20. Indicator voor bakmodus
21. Indicator voor baktijd
22. Indicator voor korstkleur
23. Indicator voor broodgrootte
VOORAFGAAND AAN HET EERSTE GEBRUIK
• Haal het apparaat en de accessoires uit de doos.Verwijder de stickers,
de beschermfolie of het plastic van het apparaat.
• Veeg voor het eerste gebruik van het apparaat alle afneembare
onderdelen af met een vochtige doek. Gebruik nooit schurende
producten.
• Plaats het apparaat op een vlakke, stabiele ondergrond. Zorg voor
minimaal 10 cm vrije ruimte rondom het apparaat. Dit apparaat is niet
geschikt voor inbouw of gebruik buitenshuis.
• Plaats de netstekker in het stopcontact.
• Stel de volgende bakmodus in: BAKE.
• Start het bakproces. Het apparaat wordt opgewarmd.
• Haal na tien minuten de stekker uit het stopcontact en laat het apparaat
volledig afkoelen.
• Wanneer het apparaat voor de eerste keer wordt ingeschakeld, zal het
een lichte geur afgeven. Dit is normaal. Zorg voor voldoende ventilatie.
Deze geur is slechts tijdelijk en zal spoedig verdwijnen.
GEBRUIK
De bakmodus instellen
U kunt de bakmodus instellen met de menutoets. De bakmodusindicatie
geeft de bakmodus aan.
• Raadpleeg de onderstaande tabel voor de juiste bakmodus.
• Druk herhaaldelijk op de menutoets om de bakmodus in te stellen. Elke
keer dat u op de toets drukt, hoort u een piepje.
Opmerking: Ook als u de laatste stand hebt bereikt, kunt u nog een
andere stand selecteren. Druk op de menutoets om terug te gaan naar de
eerste stand.
Bakmodu
s
Naam Gebruik
1 BASIC Wit en gemengd brood gemaakt van
hoofdzakelijk tarwemeel of roggemeel. Het
brood heeft een compacte consistentie. Gebruik
normale gist voor de bakmodus.
2 FRENCH Licht brood gemaakt van fijn meel. Het brood is
vaak luchtig en heeft een knapperige korst. De
bakmodus is niet geschikt voor recepten met
boter, margarine of melk.
3 WHOLE
WHEAT
Zwaar brood met zware meelsoorten waarvoor
een langere kneed- en rijsfase nodig is. Het
brood heeft een compacte consistentie.


Присоединиться к беседе по данному изделию
Здесь вы можете поделиться тем, что думаете о Princess 152010 Хлебопечка. Если у вас есть вопросы, сначала внимательно прочтите инструкцию. Запросить руководство можно с помощью контактной формы.
ответить | Это было полезно (0) (Переведено Google)
ответить | Это было полезно (0) (Переведено Google)