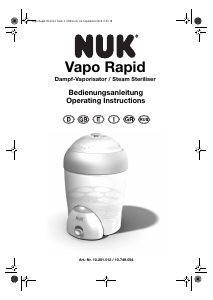
NUK Mikrowellen Dampf-Vaporisator
Verwendungszweck
Der NUK Mikrowellen Dampf-Vaporisator
ist praktisch,
wirtschaftlich und für alle NUK Glas- und PP-Flaschen (First
Choice und New Classic Flaschen) sowie weitere handelsübliche
Babyflaschen aus diesen Materialien geeignet. Er desinfiziert
bis zu 4 Flaschen mit Zubehör in nur 4 Minuten. Alle zu
desinfizierenden Teile müssen mikrowellengeeignet sein.
Achtung!
Nicht alle Produkte sind geeignet für die
Mikrowellen-Sterilisation. Bitte prüfen Sie vor Benutzung des
Gerätes die Hinweise des Herstellers zu jedem einzelnen
Produkt, welches Sie sterilisieren möchten. Bei Nichtbeachtung
der Hinweise können beim Inhalt Materialschäden, z.B.
Verformungen bei Flaschen aus PA (Polyamid) und PE
(Polyethylen), auftreten .
Das Gerät ist für Mikrowellen mit einer Leistung von
500 bis 1000 Watt geeignet.
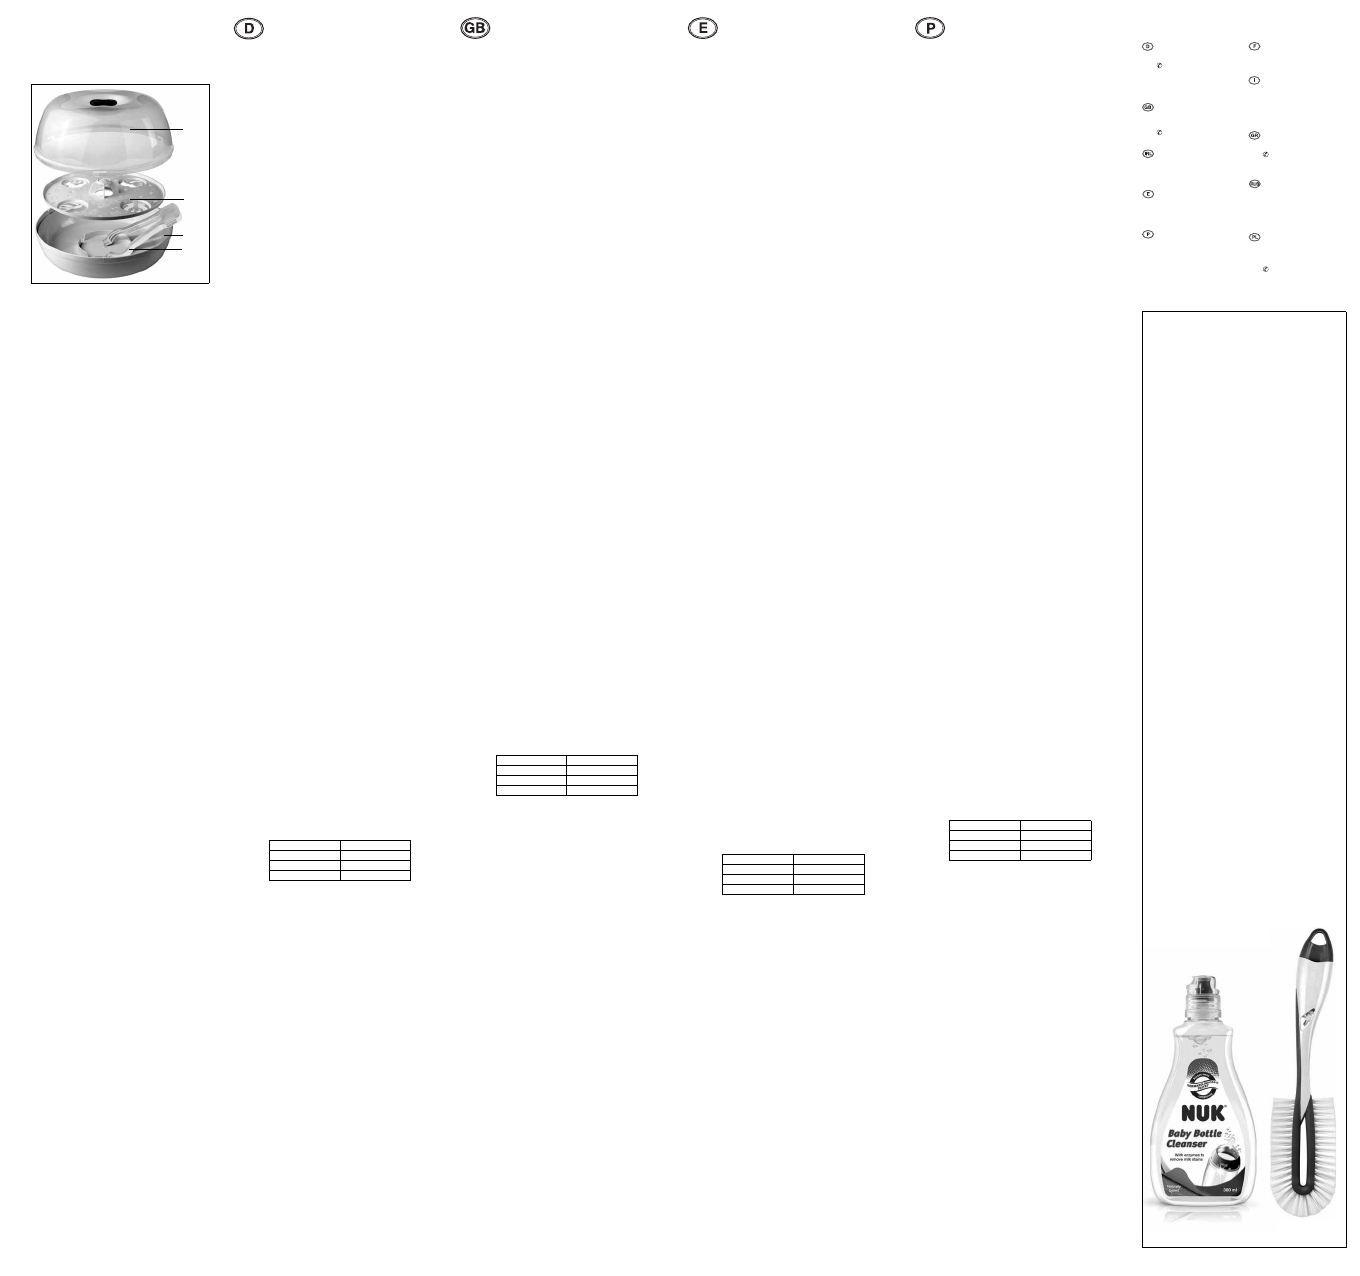
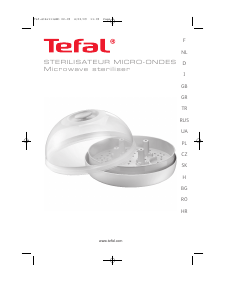
Lieferumfang
1 Deckel
(1)
; 1 Flaschenhalter
(2)
; 1 Füllsockel
(3)
;
1 Flaschenzange
(4)
Funktionsbeschreibung
Das geschlossene Gerät wird in eine Mikrowelle gestellt. Durch
Mikrowellen wird das enthaltene Wasser verdampft. Der heiße
Dampf desinfiziert die im Gerät befindlichen Teile.
Sicherheitshinweise
Allgemeine Hinweise:
– Lesen Sie vor dem Gebrauch bitte sorgfältig diese
Bedienungsanleitung. Sie ist Bestandteil des Gerätes und
muss jederzeit verfügbar sein.
– Verwenden Sie das Gerät nur für den beschriebenen
Verwendungszweck.
– Wenn Sie eine kombinierte Mikrowelle besitzen, darauf
achten, dass der Mikrowellen Dampf-Vaporisator nicht der
Hitze des Grills oder der Umluftheizung ausgesetzt wird, da
er sonst beschädigt werden könnte.
– Lassen Sie das Gerät während des Betriebes niemals
unbeaufsichtigt.
– Das Gerät darf ausschließlich auf einem festen, ebenen,
trockenen und nicht brennbaren Untergrund aufgestellt
werden.
– Das Gerät darf nicht auf heiße Herdplatten gestellt, in den
heißen Backofen geschoben oder in der Nähe von Gas- und
Durchlauferhitzern aufgestellt werden.
Schutz vor Verbrennungen und Verbrühungen:
Das Gerät arbeitet mit hohen Temperaturen und heißem
Dampf. Um sich vor Verbrühungen und Verbrennungen zu
schützen, beachten Sie daher folgendes:
– Der Mikrowellen Dampf-Vaporisator ist sehr heiß, wenn er
aus der Mikrowelle kommt. Mindestens 5 Minuten abwarten,
bis er ausreichend abgekühlt ist.
– Das heiße Gerät nur unter Verwendung von Handschuhen
von der Mikrowelle zur Ablagestelle transportieren.
– Das Gerät immer nur am Sockel transportieren.
– Vorsicht beim Öffnen des Deckels. Durch den heißen
Wasserdampf besteht Verbrühungsgefahr.
Deckel nur
durch
schräges Anheben des Deckels vom Körper weg
öffnen, damit heißer Dampf entweichen kann.
– Flaschen und Zubehör nur mit der Flaschenzange
entnehmen.
Zum Schutz Ihres Kindes:
Warnung!
Kinder können Gefahren oft nicht richtig einschätzen
und sich dadurch Verletzungen zuziehen. Beachten Sie daher:
– Dieses Produkt darf nur unter Aufsicht von Erwachsenen
verwendet werden.
– Achten Sie sorgfältig darauf, dass sich das Gerät immer
außerhalb der Reichweite von Kindern befindet.
– Achten Sie darauf, dass die Verpackungsfolie nicht zur
tödlichen Falle für Kinder wird. Verpackungsfolien sind
kein Spielzeug.
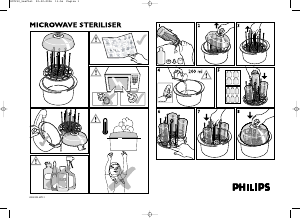
Anwendung
1. Flaschen und Zubehör sorgfältig waschen und spülen.
2. Deckel des Mikrowellen Dampf-Vaporisators abnehmen.
3. 200 ml Wasser in den Füllsockel des Mikrowellen Dampf-
Vaporisators eingießen.
Achtung!
Benutzen Sie unbedingt einen Messbecher um
die Füllmenge von 200 ml exakt einzuhalten, da sonst
Beschädigungen des Mikrowellen Dampf-Vaporisators
möglich sind.
4. Die Flaschen mit der Öffnung nach unten in die dafür
vorgesehenen Öffnungen des Flaschenhalters setzen und
das Zubehör auf der verbleibenden Fläche verteilen.
5. Deckel des Mikrowellen Dampf-Vaporisators aufsetzen.
6. Den Mikrowellen Dampf-Vaporisator in die Mikrowelle
stellen.
7. Stellen Sie die Mikrowelle auf die entsprechende Leistung
und Zeit. Die angegebene Zeit sollte nicht überschritten
werden:
Achtung!
Um jegliche Verbrühungsgefahr durch heißen
Wasserdampf oder heiße Feuchtigkeit zu vermeiden,
5 Minuten warten, bevor Sie den Mikrowellen Dampf-
Vaporisator aus der Mikrowelle herausnehmen.
8. Dann den Deckel abnehmen.
Achten
Sie auf ausreichenden Hand- und Fingerschutz.
Reinigung und Desinfektion
1. Um Kalkablagerungen zu vermeiden, den Mikrowellen
Dampf-Vaporisator nach jedem Gebrauch mit einem Tuch
abtrocknen.
2. Bei größeren Verschmutzungen kann das Gerät in der
Spülmaschine gereinigt werden.
3. Sollten Sie noch Kalkablagerungen entfernen müssen,
verwenden Sie verdünnten Haushaltsessig.
Entsorgung
Das Gerät kann über den normalen Hausmüll entsorgt werden.
Führen Sie die Verpackung einer getrennten Entsorgung
entsprechend der Vorschriften in Ihrem Land zu.
Für eventuelle Rückfragen bewahren Sie bitte Anschrift und
Artikel-Nummer auf.
Leistung Dauer
1000 Watt 4 Minuten
800 - 950 Watt 5 Minuten
500 - 750 Watt 7 Minuten
1
3
2
4
NUK Microwave Steam Steriliser
Usage
The NUK Microwave Steam Steriliser
is practical, economical
and suitable for all NUK glass and PP bottles (First Choice and
New Classic bottles) and for other commercially available baby
feeding bottles made from these materials. The Steriliser
sterilises up to 4 bottles and accessories in just 4 minutes. All
items must be suitable for microwave sterilisation.
Warning!
Not all products are suitable for microwave
sterilisation. Before using the appliance, please always check
manufacturer's instructions for each product to be sterilised.
Damage to components may occur if the instructions are not
followed, for example deformation of bottles made of PA
(Polyamide) and PE (Polyethylene).
The Steriliser is suitable for microwaves with an output of
between 500 and 1000 W.
Components
1 lid
(1)
; 1 bottle-holder
(2)
; 1 base for filling
(3)
;
1 pair of bottle tongs
(4)
Functional description
The sealed Microwave Steam Steriliser is placed in the
microwave. The microwave then allows the water to evaporate
and the hot steam which is generated sterilises the contents.
Safety instructions
General instructions:
– Please read these operating instructions carefully before
using the Steriliser. These instructions are part of the
Steriliser and must be available at all times.
– Use the Steriliser only for the intended purpose described.
– If you own a combination microwave oven, ensure that
the Microwave Steam Steriliser is not exposed to the heat
of the grill or convection heating, otherwise it may be
damaged.
– Never leave the unit unsupervised during operation.
– The Steriliser should only be set up on a firm, level, dry
and non-flammable surface.
– The Steriliser must not be placed on cooker hotplates, put
in a hot oven or set up close to gas or flow heaters.
Preventing burns and scalds:
The Steriliser operates at high temperatures using hot steam.
To avoid burning or scalding yourself please follow the
instructions below.
– The Microwave Steam Steriliser will be very hot when it
comes out of the microwave oven. Wait at least 5 minutes
until it has cooled down before removing.
– Wear oven gloves to transport the hot Steriliser from the
microwave oven to the place you are putting it down.
– Always hold the unit by the base when handling it.
– Take care when opening the lid as there is a risk of
scalding from the hot steam. Only open the lid by tilting,
away from body, so that hot steam can escape away from
you.
– Remove bottles and accessories using the tongs provided.
To protect your child:
Warning!
Children are often poor judges of hazards and this
could result in them sustaining injuries, so please note the
following.
– This product may only be used under adult supervision.
– Take care to ensure that the unit is always kept out of the
reach of children.
– Ensure that the plastic packaging is kept out of reach of
children - plastic packaging is not a toy.
Use
1. Carefully wash and rinse bottles and accessories.
2. Remove the lid of the Microwave Steam Steriliser.
3. Fill 200 ml water into the base of the Microwave Steam
Steriliser.
Warning!
It is essential to use a measuring jug to ensure
the 200 ml capacity is adhered to exactly, otherwise the
Microwave Steam Steriliser may be damaged.
4. Put the bottles upside down in the openings provided in the
bottle-holder and arrange the accessories over the
remaining surface.
5. Close the lid of the Microwave Steam Steriliser.
6. Put the Microwave Steam Steriliser in the microwave oven.
7. Set the microwave oven to the relevant power and time. Do
not exceed the time quoted.
Warning!
To prevent any risk of scalding from hot steam or
hot moisture, wait 5 minutes before removing the
Microwave Steam Steriliser from the microwave oven.
8. Then remove the lid.
Ensure
you protect your hands/fingers adequately.
Cleaning and sterilising
1. To avoid limescale deposits, dry the Microwave Steam
Steriliser with a cloth after every use.
2. The unit can be washed in a dishwasher if it gets dirtier than
usual.
3. If you have to remove limescale, use dilute household
vinegar.
Disposal
The unit can be disposed of in normal domestic waste.
Dispose of the packaging separately in accordance with your
national waste disposal regulations.
Please retain address and article number for possible future
reference.
Power Time
1000 W 4 minutes
800 - 950 W 5 minutes
500 - 750 W 7 minutes
Esterilizador a vapor NUK para
microondas
Uso previsto
El esterilizador a vapor NUK para microondas
es práctico,
económico y apto para todos los biberones de plástico PP
(polipropileno) o de cristal NUK (First Choice y New Classic), así
como para muchos otros biberones convencionales de estos
materiales. En él se pueden desinfectar hasta 4 biberones con
sus accesorios en tan solo 4 minutos. Todas las piezas que se ha
de desinfectar deben ser aptas para microondas.
¡Atención!
No todos los productos son aptos para la
esterilización en microondas. Antes de usar el aparato,
compruebe las instrucciones del fabricante de cada producto
que desee esterilizar. No tener en cuenta estas indicaciones
puede representar daños materiales en el material; por ej.,
deformaciones de los biberones de plástico PA (poliamida) y PE
(polietileno).
El aparato es adecuado para hornos microondas con una
potencia de 500 a 1000 vatios.
Piezas suministradas
1 Tapa
(1)
; 1 Soporte para biberones
(2)
; 1 Base de llenado
(3)
;
1 Pinza para biberones
(4)
Descripción del funcionamiento
El aparato se introduce cerrado en un horno microondas. Las
microondas hacen que el agua que hay en el aparato se evapore.
El vapor caliente desinfecta las piezas que se encuentran en el
aparato.
Indicaciones de seguridad
Indicaciones generales:
– Antes del uso, lea atentamente estas instrucciones de uso.
Éstas forman parte del aparato y tienen que estar a mano
en todo momento.
– Utilice el aparato solamente para el uso descrito.
– Si su horno microondas es combinado, preste atención a
que el esterilizador a vapor para microondas no se
exponga al calor del grill o calentamiento por convección,
ya que esto podría dañarlo.
– No deje nunca el aparato sin vigilancia durante su
utilización.
– El aparato sólo debe colocarse sobre una base firme,
plana, seca y no inflamable.
– El aparato no debe ser colocado sobre placas de cocina
calientes, en el horno caliente ni cerca de calentadores de
gas o de flujo continuo.
Protección frente a las quemaduras:
El aparato funciona a altas temperaturas y con vapor caliente.
Para protegerse frente a las quemaduras, tenga en cuenta lo
siguiente:
– El esterilizador a vapor para microondas está muy caliente
cuando se saca del horno microondas. Espere al menos 5
minutos hasta que se haya enfriado lo suficiente.
– Para transportar el aparato caliente desde el horno
microondas hasta la superficie de colocación debe utilizar
siempre guantes.
– Cuando esté caliente, transpórtelo sólo por la base.
– Tenga cuidado al abrir la tapa; existe peligro de
escaldadura debido al vapor de agua caliente. Solo abrir la
tapa inclinada, lejos del cuerpo, de modo que el vapor
caliente puede escapar.
– Para sacar los biberones y los accesorios utilice siempre las
pinzas.
Para proteger a su hijo:
¡Advertencia!
Los niños no son capaces de valorar el peligro
correctamente y esto hace que se lesionen. Por tanto, debe
tener en cuenta que:
– Este producto debe utilizarse únicamente bajo la
supervisión de un adulto.
– Preste mucha atención a que el aparato se encuentre
siempre fuera del alcance de los niños.
– Tenga cuidado que la bolsa de plástico no esté al alcance
de los niños. Las bolsas de plástico del envase no son un
juguete.
Utilización
1. Lavar a fondo el biberón y los accesorios.
2. Quitar la tapa del esterilizador a vapor para microondas.
3. Poner 200 ml de agua en la base de llenado del
esterilizador a vapor para microondas.
¡Atención!
Es necesario utilizar un vaso medidor para
comprobar que la cantidad de agua sea exactamente 200
ml, ya que de lo contrario se pueden producir daños en el
esterilizador a vapor para microondas.
4. Colocar los biberones con la abertura hacia abajo en los
orificios correspondientes del soporte de biberones, y
distribuir los accesorios por la superficie restante.
5. Cerrar la tapa del esterilizador a vapor para microondas.
6. Meter el esterilizador a vapor en el horno microondas.
7. Ajuste el horno microondas a la potencia y el tiempo
correspondiente. No debe sobrepasarse el tiempo indicado:
¡Atención!
Para evitar todo riesgo de escaldaduras debido
al vapor de agua caliente o al líquido caliente, espere
5 minutos antes de sacar el esterilizador a vapor del horno
microondas.
8. Para abrirlo fácilmente, gire la tapa hacia la izquierda, hasta
que se abra. A continuación, quite la tapa.
Asegúrese de proteger
adecuadamente sus manos y sus
dedos.
Limpieza y desinfección
1. Para evitar depósitos de cal, después de cada uso secar con
un paño el esterilizador a vapor para microondas.
2. El aparato se puede lavar en el lavavajillas en caso de que
esté muy sucio.
3. Si todavía quedan depósitos de cal por limpiar, utilice
vinagre doméstico diluido.
Eliminación
El aparato se puede eliminar en la basura doméstica,
recomendándose desecharlo por separado, de acuerdo a las
normas de su país.
Por favor, guarde la dirección y el número de articulo para
cualquier consulta.
Potencia Tiempo
1000 vatios 4 minutos
800 - 950 vatios 5 minutos
500 - 750 vatios 7 minutos
Esterilizador a vapor para
micro-ondas NUK
Utilização
O esterilizador a vapor para micro-ondas NUK
é prático,
económico e adequado para todos os biberões NUK de vidro e
em PP (biberões First Choice e New Classic), bem como para
outros biberões convencionais feitos destes materiais. Desinfeta
até 4 biberões com acessórios em apenas 4 minutos. Todas as
peças a desinfetar têm de ser adequadas para micro-ondas.
Aviso!
Nem todos os produtos são adequados para
esterilização em micro-ondas. Antes de utilizar o aparelho, por
favor verifique sempre os avisos do fabricante relativamente a
cada produto a ser esterilizado. Podem ocorrer danos materiais
no conteúdo, como por exemplo deformações nos biberões em
PA (poliamida) e PE (polietileno), se as instruções não forem
cumpridas.
O aparelho é adequado para fornos micro-ondas com uma
potência de 500 a 1000 Watt.
Conteúdo
1Tampa
(1)
; 1 Suporte para biberões
(2)
; 1 Base de
enchimento
(3)
; 1 Pinça para biberões
(4)
Descrição do funcionamento
O aparelho fechado é colocado no forno micro-ondas. No
micro-ondas a água é transformada em vapor. O vapor quente
desinfeta as peças que se encontram no aparelho.
Instruções de segurança
Indicações gerais:
– Antes da utilização, leia atentamente este manual de
instruções. O manual é parte integrante do aparelho e
deve estar sempre disponível.
– Utilize o aparelho apenas para o fim descrito neste manual.
– Se tiver um forno micro-ondas combinado, tenha atenção
para que o esterilizador a vapor para micro-ondas não seja
exposto ao calor do grelhador ou aquecimento por
convecção, uma vez que pode ficar danificado.
– Nunca deixe o aparelho a funcionar sem vigilância.
– O aparelho deve apenas ser colocado sobre uma superfície
fixa, plana, seca e não inflamável.
– O aparelho não deve ser colocado sobre uma placa de
fogão quente, dentro de um forno quente, nem junto a
esquentadores a gás ou caldeiras.
Proteção contra queimaduras e escaldões:
O aparelho funciona a temperaturas elevadas, utilizando vapor
quente. Para se proteger contra escaldões e queimaduras,
tenha em atenção o seguinte:
– O esterilizador a vapor para micro-ondas está muito
quente quando sai do forno micro-ondas. Aguarde pelo
menos 5 minutos até que este tenha arrefecido o
suficiente para ser retirado.
– Utilize luvas para retirar o aparelho quente do forno
micro-ondas.
– Se estiver quente, transporte o aparelho só pela base.
– Tenha cuidado ao abrir a tampa, pois existe o perigo de
escaldão devido ao vapor de água quente. Abrir
unicamente a tampa por inclinação , afastada do corpo de
modo a que o vapor quente saia.
– Retire os biberões e os acessórios apenas com a pinça para
biberões.
Para a proteção do seu filho:
Aviso!
A maior parte das vezes, as crianças não conseguem
avaliar os perigos corretamente podendo, por isso, sofrer
ferimentos. Por conseguinte, tenha em atenção que:
– Este produto só deve ser usado sob a vigilância de adultos.
– Assegure-se sempre de que o aparelho se encontra fora do
alcance das crianças.
– Tenha em atenção que a película da embalagem pode ser
fatal para as crianças. As películas da embalagem não são
brinquedos.
Utilização
1. Lave e enxague cuidadosamente os biberões e acessórios.
2. Retire a tampa do esterilizador a vapor para micro-ondas.
3. Coloque 200 ml de água na base de enchimento do
esterilizador a vapor para micro-ondas.
Atenção!
Utilize sempre um recipiente graduado para
assegurar que a quantidade de água é de exatamente
200 ml, caso contrário o esterilizador a vapor para micro-
-ondas pode ficar danificado.
4. Coloque os biberões com o gargalo virado para baixo nas
aberturas do suporte para biberões previstas para o efeito e
distribua os acessórios pelas restantes superfícies.
5. Feche a tampa do esterilizador a vapor para micro-ondas.
6. Coloque o esterilizador a vapor no forno micro-ondas.
7. Regule o forno micro-ondas para a potência e o tempo
adequados. O tempo indicado não deve ser excedido:
Atenção!
Aguarde 5 minutos antes de retirar o
esterilizador a vapor do forno micro-ondas para evitar o
perigo de queimaduras devido ao vapor de água e
humidade quentes.
8. Para abrir facilmente o aparelho, rode a tampa no sentido
anti-horário, até que se desencaixe. De seguida, retire-a.
Proteja
as mãos e os dedos de forma adequada.
Limpeza e desinfeção
1. Para evitar a formação de calcário, seque o esterilizador a
vapor para micro-ondas com um pano após cada utilização.
2. Se o aparelho estiver muito sujo pode ser lavado na
máquina de lavar louça.
3. Se for necessário remover resíduos de calcário, utilize
vinagre diluído.
Eliminação
O aparelho pode ser eliminado juntamente com o lixo
doméstico normal.
Elimine a embalagem separadamente, de acordo com as
normas do seu país.
Por favor, guarde a morada e o número do artigo para possível
referência futura.
Potência Duração
1000 Watt 4 minutos
800 - 950 Watt 5 minutos
500 - 750 Watt 7 minutos
Kennen Sie auch schon die anderen Produkte aus
dem NUK-Programm? Zum Beispiel…
NUK Spülreiniger
für Flaschen und Sauger
• Speziell für Babyartikel
• Naturbasierte Inhaltsstoffe
• Leicht und restlos ausspülbar
Auf natürliche Weise gegen hartnäckigen Schmutz:
Babys Nahrung besteht in den ersten Lebensmonaten aus
Milch- und Breinahrung. Die hartnäckigen Milcheiweiße
bleiben als Reste in Flaschen, den Trinksaugern sowie
Babygeschirr zurück und bilden dort Keime und Bakterien
und schlechte Gerüche. Der NUK SPÜLREINIGER wurde
speziell zur Reinigung von Babyartikeln entwickelt:
• auf Basis naturbasierter Inhaltsstoffe, die aufgrund von
Enzymen insbesondere Milch, Brei und Saftrückstände
zuverlässig entfernen
• so mild, dass Sie Babygeschirr wie Babyflaschen und
Sauger, Cups, Esslerngeschirr, aber auch alles andere,
was mit dem Mund in Berührung kommt, ganz
bedenkenlos und babygerecht reinigen können
• in einer dünnflüssigen Konsistenz, die den Reiniger
schnell verteilt und sich genauso schnell und restlos
wieder ausspülen lässt.
Weitere Informationen erhalten Sie auf www.nuk.com
Do you know also the other products from the NUK
range? For example…
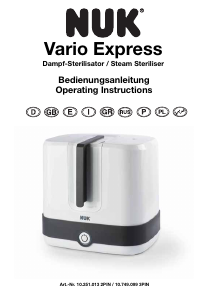
NUK Baby Bottle Cleanser
for teats and bottles
• Especially for baby products
• Natural-based, with particularly effective ingredients
• Gentle formula that is easily rinsed away
A natural-based cleaner for tough stains:
A baby's food in the first few months consists mainly of
milk and purée. The tough milk proteins are left in the
baby bottle, the teat and on the dishes, cultivating germs,
bacteria and bad smells. The NUK BABY BOTTLE
CLEANSER has been specially developed for cleaning baby
products:
• reliably removes milk, purée and juice residue in
particular thanks to the enzymes contained in its
naturalingredients
• is so mild that it can be safely used on all baby products,
for example baby bottles and teats, cups, cutlery, as well
as anything that comes into contact with a baby's
mouth
• a thin fluid consistency for quick and easy cleaning and
rinsing.
For more information, please visit: www.nuk.com
Contact addresses
MAPA GmbH
Industriestraße 21-25
27404 Zeven
01801 / 62 72 46
(0,04 EUR/ Min. aus dem deutschen
Festnetz, maximal 0,42 EUR/Min.
aus dem Mobilfunknetz)
www.nuk.de
MAPA Spontex U.K. Ltd.
Berkeley Business Park,
Wainwright Road
Worcester WR4 9ZS
0845 300 2467
www.nuk.co.uk
Intrapharma Consumer Health
Magna Business Park
Citywest Road
Dublin 24
United Drug House
Roche Diagnostics, S.L.
Avda. de la Generalitat, 171-173
08174 Sant Cugat del Vallès,
Barcelona
www.nuk.com.es
Representado e distribuído em
Portugal por:
Laboratórios Vitória, S.A.
Rua Elias Garcia, 28
2700-327 Amadora
Linha de Apoio ao Cliente
800 910 112
(dias úteis - 9h00 às 18h00)
Allègre Puériculture
41 rue Edouard Martel
42000 Saint Etienne
www.nuk.fr
MAPA SPONTEX ITALIA S.p.A.,
via San Giovanni Bosco 24,
20010 Pogliano Milanese, Milano
Italia, www.nuk.it
Numero Verde: 800 190 191
Attivo da lunedì a venerdì dalle ore
8.00 alle ore 19.00
Φάρμαπρο ΕΕ-Χ. Τζήμου & Σια
Τ.Θ. 291 - Καλοχώρι 57009
Θεσσαλονίκη
2310 751 525
Φαξ: 2310 789 621
info@nuk.gr
A.К. Хаазе Остхандельсгезельшафт мбХ
Московское представительство
ул. Дмитрия Ульянова д. 16 корп. 2
офис 391-392
117292 Москва
medical@achaase.ru
www.nuk-baby.ru
BABY LAND Dariusz Staniszewski
al. Stanów Zjednoczonych 67/D7
04-028 Warszawa
biuro: ul. Trakt Brzeski 118,
05-077 Warszawa
22 773 36 76 (78, 79, 81)
faks:. 22 810 41 15
www.nuk.pl


Присоединиться к беседе по данному изделию
Здесь вы можете поделиться тем, что думаете о NUK Micro Стерилизатор. Если у вас есть вопросы, сначала внимательно прочтите инструкцию. Запросить руководство можно с помощью контактной формы.