
AS774E
Lees eerst de veiligheidsinstructies.
GEBRUIKSAANWIJZING
• Zorg ervoor dat het haar 80% droog is en klitvrij is
doorgekamd. Verdeel het haar in plukken om het te
stylen.
• Bevestig het gewenste opzetstuk op het handvat. Voor
het verwisselen van de opzetstukken verwijzen we naar
het hoofdstuk ‘Opzetstukken verwisselen’.
• Verschuif de schakelaar naar de geschikte instelling voor
uw haartype om het apparaat aan te zetten. Let op: Het
blauwe LED-lampje zal oplichten om aan te geven dat
de ionenfunctie is geactiveerd.
• Schuif na gebruik de schakelaar naar stand ‘0’ om
het apparaat uit te zetten en haal de stekker uit het
stopcontact.
• Laat het apparaat afkoelen voordat u hem opbergt.
Het wisselen van de opzetstukken
• Plaats het opzetstuk op het handvat en zorg dat de twee
inkepingen op het opzetstuk op één lijn liggen met de
knoppen op het handvat.
• Druk dan het opzetstuk op het handvat totdat hij
vastklikt.
• Om een opzetstuk te verwijderen, houdt u de twee
knoppen aan de zijkant van de handgreep ingedrukt en
trekt u het opzetstuk omhoog en van de handgreep af.
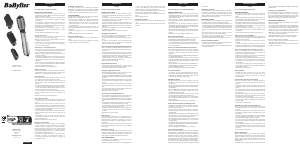
Grote ovale opzetborstel voor volume en model
• Plaats de borstelkop onder een haarlok, dicht bij de
hoofdhuid en houd hem daar een paar seconden om
volume te creëren bij de haaraanzet.
• Gebruik de borstelkop om het haar bij de haarwortel
omhoog te werken, terwijl u het droogt.
• Beweeg de borstelkop langzaam naar beneden door het
haar. Wanneer u aan het eind van de lok komt draait u
de airstyler iets naar uw gezicht toe om de haarpunten
om te krullen
• Om het haar lang in model te houden, gebruikt u de
koele stand ‘*’ op warm haar terwijl u de borstelkop bij
de haaraanzet houdt.
• Herhaal dit voor elke haarlok.
Föhn-opzetstuk
• Gebruik het föhn-opzetstuk om vóór het stylen
overtollig water uit het haar te verwijderen, door de
luchtstroom op het haar te richten en rond om het
hoofd te blazen.
Opzetborstel om het haar steil te maken
• Plaats de borstelkop onder een haarlok, dichtbij de
haaraanzet met de stevige borstelharen naar boven
gericht.
• Trek met de andere hand de haarlok strak tegen de
borstelkop totdat de harde borstelharen door het haar
steken.
• Laat de borstelkop rustig door de lok glijden terwijl u de
lok straktrekt en controle houdt over het haar, zodat de
lok steil wordt.
• Wanneer de borstelkop aan het einde van de haarlok
komt, de borstel naar onderen draaien om de uiteinden
van het haar in model te brengen.
• Voor extra controle over de haarlok, plaatst u uw andere
hand over de borstelkop terwijl hij door de haarlok naar
beneden glijdt.
• Herhaal dit voor elke haarlok.
Gladmakende opzetborstel met luchtkussen
• Plaats de borstelkop onder een haarlok, dicht bij de
hoofdhuid met de harde borstelharen naar boven
gericht.
• Gebruik de andere hand om de haarlok strak over de
borstelkop te trekken totdat de borstelharen door het
haar steken.
• Laat de borstelkop voorzichtig door de haarlok glijden
om het haar van knopen en krullen te ontdoen en glad
en steil te maken terwijl het gedroogd wordt.
• Voor extra controle over de haarlok, plaatst u uw andere
hand over de borstelkop terwijl hij door de haarlok naar
beneden glijdt.
• Om uw kapsel af te werken en de bovenkant van het
haar glad te maken, plaatst u de borstel bovenaan de
haarlok en borstelt u het haar zoals u op dat normaal
ook doet.
• Herhaal dit voor elke haarlok.
Warmte-instellingen
Er zijn 2 warmtestanden en een koude stand. Gebruik
de koude stand op warm haar om het model te xeren.
Schuif de schakelaar naar de eerste positie om de koude
stand ‘*’ te selecteren, naar de tweede positie ‘I’ voor
matige warmte en naar de derde stand ‘II’ voor een hoge
temperatuur.
• Gebruik bij broos, jn, gebleekt of gekleurd haar de
lagere warmtestand. Gebruik voor dikker haar de hogere
warmtestand.
Technologie tegen pluizig haar
Het geavanceerde dubbele ionensysteem voor een
goede vochtbalans combineert positieve en negatieve
ionen, die samenwerken om pluizig haar tegen te gaan,
terwijl u het haar in model brengt. Het haar voelt daardoor
zijdezacht en verzorgd aan, en krijgt een luxe glans.
VERZORGING & ONDERHOUD
Volg onderstaande stappen om uw apparaat in optimale
conditie te houden:
• Zorg ervoor dat het apparaat uit staat en afgekoeld is
en de stekker uit het stopcontact is. Maak de buitenkant
van het apparaat schoon met een vochtige doek. Zorg
dat er geen water in het apparaat komt en dat hij
helemaal droog is voordat u hem weer gaat gebruiken.
• Wikkel het snoer niet om het apparaat heen maar rol het
snoer losjes op naast het apparaat.
• Gebruik het apparaat niet met een strakstaand snoer.
• Haal altijd de stekker uit het stopcontact na gebruik.
Het schoonmaken van het achterlter
• Zorg ervoor dat het apparaat uit staat en afgekoeld is en
de stekker uit het stopcontact is.
• Gebruik een zachte borstel om haartjes en ander vuil uit
het lter te verwijderen.
AS774E
Lesen Sie bitte zuerst die Sicherheitshinweise.
GEBRAUCHSANLEITUNG
• Vergewissern Sie sich, dass das Haar zu 80% trocken
und durchgekämmt ist, so dass es keine Knötchen mehr
enthält. Das Haar in Abschnitte aufteilen, um es auf das
Stylen vorzubereiten.
• Den jeweiligen Aufsatz am Griff befestigen. Im
Abschnitt‚ Auswechseln der Aufsätze‘ nden Sie weitere
Informationen.
• Den Regler auf die für Ihren Haartyp geeignete
Temperaturstufe schieben, um das Gerät einzuschalten.
Anmerkung: Die blaue LED leuchtet, um anzuzeigen,
dass die Ionenfunktion aktiviert ist.
• Nach dem Gebrauch den Regler wieder auf ‘0’ schieben,
um das Gerät auszuschalten, und den Netzstecker
ziehen.
• Das Gerät vor dem Verstauen abkühlen lassen.
Auswechseln der Aufsätze
• Den Aufsatz auf den Griff schieben und die beiden
Einkerbungen an den Knöpfen am Gri ausrichten.
• Den Aufsatz auf den Gri schieben, bis er einrastet.
• Um einen Aufsatz zu entfernen, die beiden Knöpfe auf
der Seite des Geräts gedrückt halten und den Aufsatz
nach oben abziehen.
Großer ovaler Bürstenaufsatz für Volumen & Form
• Den Bürstenaufsatzkopf unter einer Haarsträhne
nahe der Kopfhaut ansetzen und einige Sekunden
dort halten, um mehr Volumen an die Haaransätze zu
bringen.
• Beim Trocknen die Haare mithilfe des Bürstenaufsatzes
an den Wurzeln anheben.
• Den Bürstenkopf langsam nach unten durch das Haar
bewegen. Am Ende der Haarsträhne den Airstyler leicht
in Richtung Ihres Gesichts drehen, um die Spitzen nach
innen zu legen.
• Damit die Frisur lange hält, sollten Sie die Kühlstufe «*“
wählen, während Sie den Bürstenkopf im noch warmen
Haar an die Wurzeln halten.
• Diesen Vorgang für jede Haarsträhne wiederholen.
Trockendüsenaufsatz
• Verwenden Sie den Trockendüsenaufsatz, um vor
dem Stylen überschüssige Feuchtigkeit zu entfernen,
indem Sie den Luftstrom auf das Haar richten und den
Luftstrom um den Kopf herum bewegen.
Glättbürstenaufsatz
• Den Bürstenkopf unter einer Haarsträhne nahe der
Kopfhaut so ansetzen, dass die festen Borsten nach
oben zeigen.
• Mit der anderen Hand die Haarsträhne stra gegen den
Bürstenkopf ziehen, bis die festen Borsten das Haar
durchdringen.
• Mit dem Bürstenkopf sanft durch die Strähne gleiten
und sie während des Glättens straffen und in die
gewünschte Richtung legen.
• Den Bürstenkopf am Ende der Strähne nach innen
drehen, um die Haarspitzen in Form zu bringen.
• Für zusätzliche Kontrolle legen Sie Ihre andere Hand
über den Bürstenkopf, während Sie an der Strähne
entlang gleiten.
• Diesen Vorgang für jede Haarsträhne wiederholen.
Polster-Bürstenaufsatz für geschmeidiges Haar
• Den Bürstenkopf unter einer Haarsträhne nahe der
Kopfhaut so ansetzen, dass die weichen, flexiblen
Borsten nach oben zeigen.
• Mit der anderen Hand die Haarsträhne straff gegen
den Bürstenkopf ziehen, bis die Borsten das Haar
durchdringen.
• Den Bürstenkopf sanft durch die Strähne gleiten lassen,
um während des Trocknens Knoten und Locken zu
entfernen und das Haar geschmeidig zu machen.
• Für zusätzliche Kontrolle legen Sie Ihre andere Hand
über den Bürstenkopf, während Sie an der Strähne
entlang gleiten.
• Um die Frisur zu vollenden und die Oberseite des Haares
zu glätten, die Bürste oben an der Strähne ansetzen und
das Haar wie gewohnt bürsten.
• Diesen Vorgang für jede Haarsträhne wiederholen.
Temperatureinstellungen
Das Gerät bietet 2 Wärmestufen und eine Kühlstufe.
Abschließend die Kühlstufe auf dem warmen Haar
verwenden, um Ihre Frisur zu xieren. Den Schalter für die
Kühlstufe ‘*’ auf die erste Position schieben, die zweite
Position ‘I’ ist für eine geringere Temperaturstufe, und
die dritte Position ‘II’ ist für eine höhere Temperaturstufe.
Für empndliches, feines, gebleichtes oder koloriertes
Haar sollten Sie die niedrige Temperaturstufe wählen.
Für dickeres Haar können Sie die höhere Temperaturstufe
verwenden.
Anti-Frizz-Technologie
Das fortschrittliche, feuchtigkeitsausgleichende duale
Ionensystem kombiniert sowohl positive als auch
negative Ionen, die gemeinsam wirken, um beim Stylen
Frizz zu entfernen. Ihr Haar fühlt sich seidig gepegt an
und erhält einen luxuriösen Glanz.
REINIGUNG & PFLEGE
Um Ihr Gerät in einem möglichst guten Zustand zu
erhalten, befolgen Sie bitte die folgenden Schritte:
• Vergewissern Sie sich, dass das Gerät ausgeschaltet, vom
Stromnetz getrennt und abgekühlt ist. Die Außenseite
des Geräts mit einem feuchten Tuch abwischen. Achten
Sie darauf, dass kein Wasser in das Gerät eindringt und
dass es vor dem Gebrauch wieder vollständig trocken
ist.
• Das Kabel nicht um das Gerät wickeln, sondern
stattdessen locker neben dem Gerät aufrollen.
• Das Gerät nicht zu weit weg von der Steckdose
verwenden, um nicht am Kabel zu zerren.
• Nach dem Gebrauch immer den Netzstecker ziehen.
Reinigen des Rückseite Filters
• Vergewissern Sie sich, dass das Gerät ausgeschaltet, vom
Stromnetz getrennt und abgekühlt ist.
• Mit einer weichen Bürste Haare und andere Rückstände
vom Filter entfernen.
AS774E
Lisez d’abord les consignes de sécurité.
INSTRUCTIONS D’UTILISATION
• Assurez-vous que les cheveux sont secs à 80 % et
parfaitement démêlés. Divisez la chevelure en mèches
prêtes à être mises en forme.
• Fixez l’accessoire de votre choix sur la poignée. Pour
changer d’accessoire, consultez le chapitre « Changer
d’accessoire ».
• Pour allumer l’appareil, réglez l’interrupteur sur
la température adaptée à votre type de cheveux.
Remarque : le voyant LED bleu s’allumera pour conrmer
l’activation de la fonction ionique.
• Après utilisation, sélectionnez la position « 0 » afin
d’éteindre l’appareil. Ensuite, débranchez le cordon
d’alimentation.
• Laissez l’appareil refroidir avant de le ranger.
Changer d’accessoire
• Placez l’accessoire sur la poignée et alignez les deux
encoches avec les boutons de la poignée.
• Enfoncez l’accessoire sur la poignée jusqu’à ce qu’un clic
conrme qu’il est bien xé.
• Pour retirer un accessoire, maintenez les deux boutons
sur le côté de la poignée enfoncés et détachez
l’accessoire de la poignée.
Grande brosse ovale Volume & Forme
• Placez la brosse sous une mèche de cheveux, près du
cuir chevelu, et maintenez-la en place durant quelques
secondes an de donner du volume aux racines.
• Durant le séchage, utilisez la brosse pour décoller les
cheveux à la racine.
• Faites glisser lentement la brosse le long de la mèche et,
lorsque vous atteignez les pointes, tournez légèrement
l’appareil vers le visage pour modeler les cheveux vers
l’intérieur.
• Pour une mise en forme longue durée, utilisez le réglage
froid « * » sur cheveux chauds tout en maintenant la tête
de brosse à la hauteur des racines.
• Répétez l’opération pour chaque mèche.
Embout de séchage
• Utilisez l’embout de séchage pour éliminer l’excédent
d’humidité et préparez la mise en forme en dirigeant le
ux d’air sur les cheveux, tout autour de la tête.
Brosse de lissage
• Placez la brosse sous une mèche de cheveux, près du
cuir chevelu, les poils durs dirigés vers le haut.
• De l’autre main, tirez la mèche de cheveux contre la
brosse jusqu’à ce que les poils durs pénètrent dans la
mèche.
• Faites délicatement glisser la brosse à travers la mèche
en créant de la tension dans les cheveux pour les lisser.
• Lorsque vous atteignez l’extrémité de la mèche, tournez
la brosse pour mettre en forme les pointes.
• Pour un contrôle accru, tenez la tête de brosse de l’autre
main en la faisant glisser sur toute la longueur de la
mèche.
• Répétez l’opération pour chaque mèche.
Brosse de lissage plate
• Placez la brosse sous une mèche de cheveux, près du
cuir chevelu, les poils doux et exibles dirigés vers le
haut.
• De l’autre main, tirez la mèche de cheveux contre la
brosse jusqu’à ce que les poils pénètrent dans la mèche.
• Faites doucement glisser la tête de brosse le long de la
mèche pour éliminer les nœuds et les boucles et lisser
les cheveux tout en les séchant.
• Pour un contrôle accru, tenez la tête de brosse de l’autre
main en la faisant glisser sur toute la longueur de la
mèche.
• Pour terminer la mise en forme et lisser le haut des
cheveux, placez la brosse tout en haut de la mèche et
brossez normalement.
• Répétez l’opération pour chaque mèche.
Réglages de température
L’appareil dispose de deux réglages de température
et d’une fonction air froid. Pour mettre vos cheveux
en forme, utilisez le réglage froid sur cheveux chauds.
Mettez l’interrupteur dans la première position pour
sélectionner la fonction air froid « * », dans la deuxième
position pour la chaleur modérée « I » et dans la troisième
position pour la chaleur intense « II ».
Si vos cheveux sont ns, délicats, colorés ou décolorés,
privilégez le réglage de température modérée. Si
vos cheveux sont plus épais, utilisez le réglage de
température élevée.
Technologie anti-frisottis
Le double système ionique sophistiqué équilibre
l’hydratation en combinant des ions positifs et négatifs
qui agissent ensemble pour éliminer les frisottis pendant
le coiage, pour des cheveux brillants, soyeux et lisses.
SOIN ET ENTRETIEN
Pour garder votre appareil dans des conditions optimales,
veuillez suivre les instructions ci-dessous.
• Assurez-vous que l’appareil est éteint, débranché et
froid. Nettoyez l’extérieur de l’appareil à l’aide d’un
chiffon humide. Évitez que l’eau ne pénètre dans
l’appareil et veillez à ce que celui-ci soit parfaitement
sec avant utilisation.
• N’enroulez pas le câble d’alimentation autour de
l’appareil. Enroulez plutôt celui-ci séparément, à côté de
l’appareil.
• N’utilisez pas l’appareil avec le cordon d’alimentation
tendu.
• Débranchez l’appareil après chaque utilisation.
Nettoyage du ltre arrière
• Assurez-vous que l’appareil est éteint, débranché et
froid.
• À l’aide d’une brosse à poils doux, éliminez les cheveux
et autres résidus contenus dans le ltre.
AS774E
Read the safety instructions rst.
INSTRUCTIONS FOR USE
• Ensure the hair is 80% dry and combed through to
remove any tangles. Divide the hair into sections ready
for styling.
• Secure the selected attachment onto the handle. To
interchange between the attachments, refer to the
‘Changing the Attachments’ section.
• Slide the switch to the heat setting suitable for your
hair type to turn the appliance on. Please note: The blue
LED light will illuminate to indicate the ionic feature is
activated.
• After use, slide the switch to the ‘0’ position to switch o
and unplug the appliance.
• Allow the appliance to cool before storing away.
Changing the Attachments
• Place the attachment onto the handle and line up the
two indents with the buttons on the handle.
• Push the attachment onto the handle until it clicks into
place.
• To remove an attachment, press and hold the two
buttons on the side of the appliance and pull the
attachment away from the handle.
Large Oval Volumising & Shaping Brush Attachment
• Place the brush head underneath a section of hair, close
to the scalp and hold for a few seconds to boost volume
at the roots.
• Use the brush head to lift the hair at the roots as you dry.
• Slowly move the brush head down through the hair, as
you reach the end of the hair section, rotate the airstyler
slightly towards your face to curl the ends under.
• For a lasting style, select the cool setting ‘*’ on warm hair
whilst holding the brush head at the roots.
• Repeat for each section of hair.
Drying Nozzle Attachment
• Use the drying nozzle attachment to remove excess
moisture prestyling by directing the airow onto the
hair and moving the airow around the head.
Straightening Brush Attachment
• Place the brush head under a section of hair, close to the
scalp with the rm bristles pointing upwards.
• Use your other hand to pull the hair section taut against
the brush head until the rm bristles penetrate through
the hair.
• Gently glide the brush head through the section creating
tension and control through the hair to straighten the
section.
• As the brush head nears the end of the hair section, turn
the brush head under to give shape at the ends of the
hair.
• For added control, place your other hand over the brush
head as you glide down the hair section.
• Repeat for each section of hair.
Smoothing Cushion Brush Attachment
• Place the brush head under a section of hair, close to the
scalp with the soft exible bristles pointing upwards.
• Use your other hand to pull the hair section taut against
the brush head until the bristles penetrate through the
hair.
• Gently glide the brush head through the section of hair
to remove knots and curls and smooth as you dry.
• For added control, place your other hand over the brush
head as you glide down the hair section.
• To nish your style and smooth the top of the hair, place
the brush on the top of the hair section and brush as
normal.
• Repeat for each section of hair.
Heat Settings
There are 2 heat settings plus a cool setting. Use the cool
setting on warm hair to set your style. Slide the switch to
the rst position to select the cool setting ‘*’, the second
position for the low heat ‘I’, and the third position for the
high heat ‘II’.
If you have delicate, ne, bleached or coloured hair, use
the lower heat setting. For thicker hair, use the higher
heat setting.
Anti-Frizz Technology
The advanced moisture-balancing dual ionic system
combines both positive and negative ions, that work
together to eliminate frizz as you style. Your hair is left
feeling silky and conditioned with luxurious shine.
CARE & MAINTENANCE
To help keep your appliance in the best possible
condition, follow the steps below:
• Ensure the appliance is switched o, unplugged and
cool. To clean the outside of the appliance, wipe with
a damp cloth. Make sure that no water enters the
appliance and it is completely dry before use.
• Do not wrap the lead around the appliance, instead coil
the lead loosely by the side of the appliance.
• Do not use the appliance at a stretch from the power
point.
• Always unplug after use.
Cleaning the Rear Filter
• Ensure the appliance is switched o, unplugged and
cool.
• Using a soft brush, clean any hair and other debris from
the lter.
BABYLISS SARL
ZI du Val de Calvigny
59141 Iwuy
France
www.babyliss.com
FAC 2023/07
Made in China
Fabriqué en Chine
AS774E - B79a
FRANÇAIS DEUTSCHENGLISH NEDERLANDS
IB-22/087A-1



Присоединиться к беседе по данному изделию
Здесь вы можете поделиться тем, что думаете о BaByliss AS774E Стайлер для волос. Если у вас есть вопросы, сначала внимательно прочтите инструкцию. Запросить руководство можно с помощью контактной формы.